Sockeye salmon, also known as Red Salmon or Reds, are a unique species of salmon. They are known for returning in large numbers, and being quite tasty. This guide covers information about the sockeye life cycle and behavior, gear and rigs used to fish for them, and how to target them in lakes.
There are four sections in this guide. The first covers sockeye biology and behavior. The second the gear and tackle you’ll need. The third is the basics on how to fish for them. Lastly are pro tips for the experienced sockeye angler.
This guide is just the beginning – more information about fishing for sockeye can be found on the how to fish for sockeye page.
About Sockeye
The life of a sockeye starts out different from other salmon species. Although there are exceptions, sockeye only spawn in river systems which have a significant lake attached. The sockeye will spawn in rivers, like other salmon, but also in shallow spawning beds in the lake itself.
The eggs hatch between six to nine weeks after fertilization. Once the eggs hatch the young smolt will spend their first year in the lake, before heading downstream to the ocean.
Once in the ocean the sockeye feed on plankton, rather than bait fish like chinook and coho salmon do. After two or three years in the ocean the adult sockeye return to freshwater to spawn.
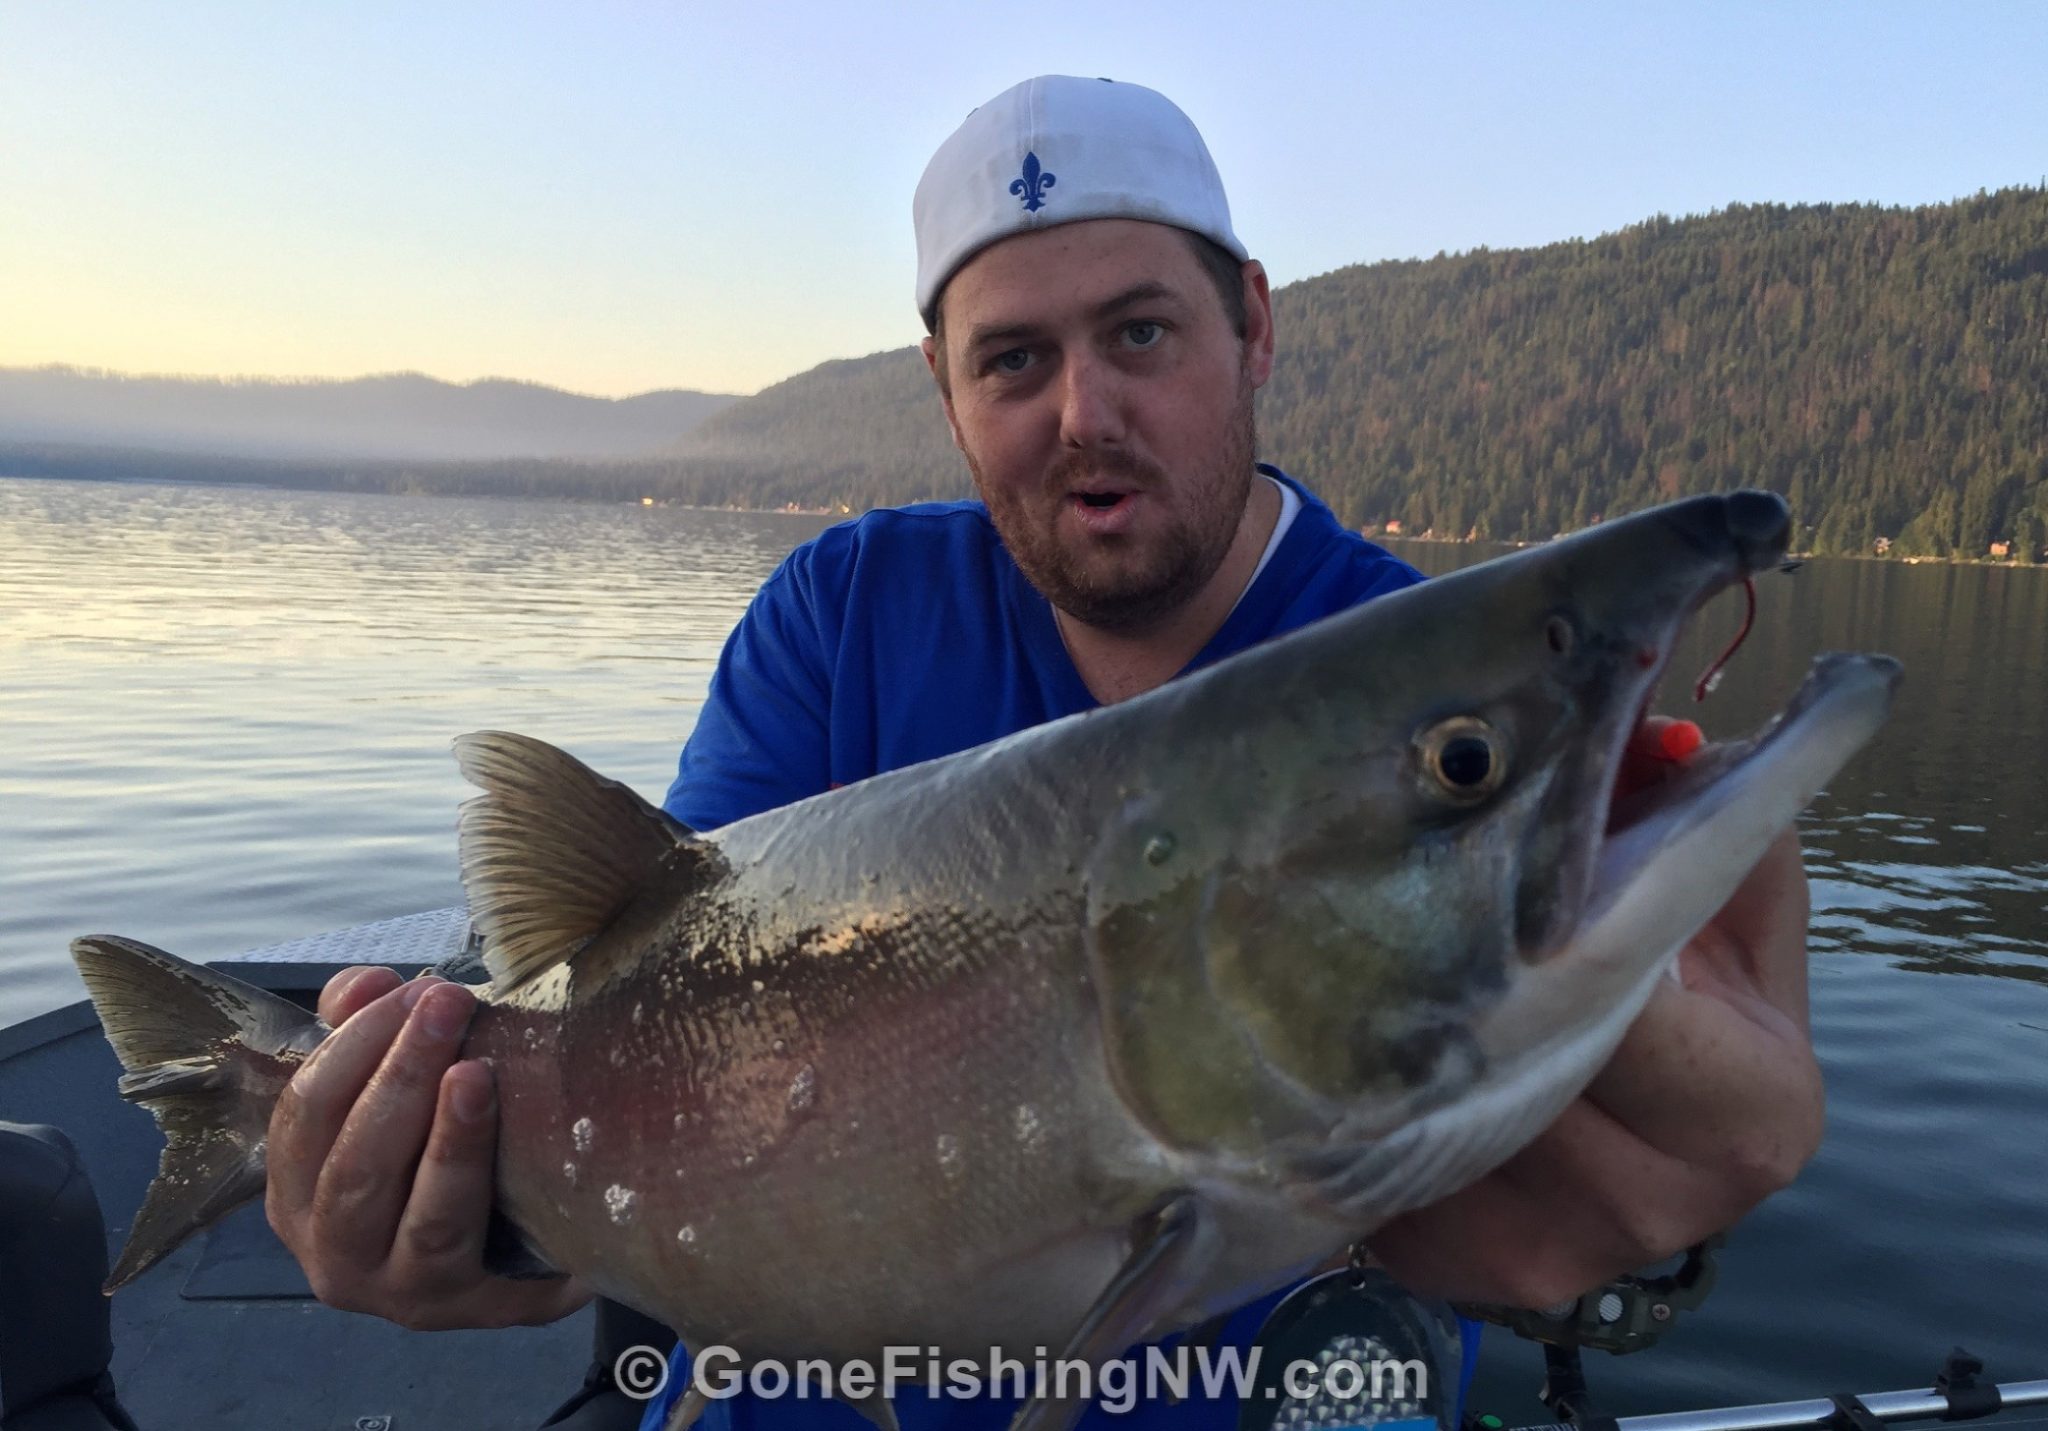
During their spawning journey sockeye are well known for developing red bodies and green heads, making them a very distinctive.
The fish are a target of commercial fishing in the ocean, and account for almost 20% of the harvest by weight. The average weight of an adult spawning sockeye is around 9 pounds, although common wisdom is that the average size is higher in Alaska than it is farther south in Washington state. The record catch size supports this with the record sockeye caught in Alaska being 16 pounds, while the largest in Washington is 10.6 pounds (caught in Lake Washington back in 1982).
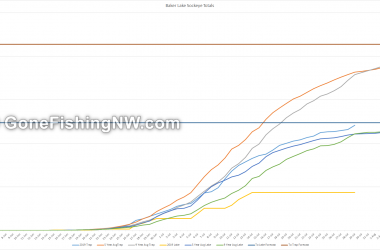
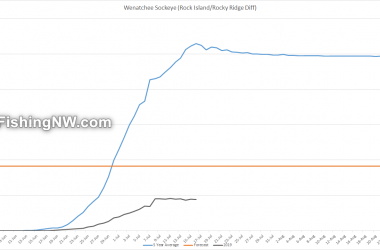
In Washington state there are several runs of sockeye – but not all are fishable by the general public either due to low numbers or tribal fishing rights. Some of the well known runs return to Lake Ozette, Lake Quinault, Lake Washington, Baker Lake, Lake Wenatchee and the Okanogan river.
Efforts are currently underway to create sustainable sockeye runs to Lake Cushman and Cle Elum Lake.
Landlocked populations of sockeye are called kokanee. Given the more limited food supply in lakes, compared to the ocean, adult kokanee are often considerably smaller than ocean going sockeye.
Sockeye Gear
This guide focuses on fishing for sockeye in lakes, and as such that is the gear and rigs that will be covered. Sockeye can also be targeted in rivers as they journey upstream, and in saltwater.
Fishing for sockeye in lakes requires a boat. With rare exception, they aren’t close enough to shore to make targeting them worth the time. The primary way people fish for them is by trolling and that is what this guide will cover.
When trolling for sockeye one needs something to get the line down to the desired depth. There are three primary ways this is done – downrigger, weight or a diver. Which one you use will affect what is the ideal rod to use. Generally speaking you’ll want a casting rod of light to medium power.
The reel doesn’t depend on how you achieve the right depth. If you prefer low profile reels the I suggest the Abu Garcia Silver Max. If you need more line capacity (maybe for other fishing you plan on doing) then consider the Okuma Classic Level Wind reel.
If you have the cash and want high end equipment then consider the Shimano Curado for low profile and the Shimano Calcutta B for line capacity. Both are excellent reels that have never failed me, even after several years of hard use.

Using Downriggers
My favorite way to control depth is with downriggers, and my favorite downrigger is the electric Scotty models. Downriggers have several advantages over the other methods, including:
- More accurate depth control
- Easy depth adjustment
- Allows gear to run close to the boat (which is a big plus in crowded fishing conditions)
- No additional weight or drag to reel in
The main negative of downriggers is the cost.
When downrigger fishing for sockeye I like to use some of the same light rods I use for trout and kokanee. I believe the extra give in the lighter setup helps keep the fish on the line as it fights. However the noodle rods some people like for kokanee are too light.
A decent choice for sockeye, especially where the average size is on the small side like the Columbia River runs, is the Tica Kokanee rod. Another good option is a Okuma Celilo Kokanee Rod.
If you want to go high end then the G Loomis Kokanee rods are great.
You can use just about any kind of mainline when using downriggers. If using mono you’ll probably want 10 to 15 pound line. For braid I’d use 15 to 20 pound line. Personally, I prefer braid because it transmits the movement of the bite well, and cuts through the water easily. These days the only braid I use is Power Pro Depth Hunter, since it has an easy way for me to tell how much line is out.

Using Weights
If using weights you’ll need a selection of different weight sizes, depending on the depth you need to achieve. When I use this method I like using cannonball weights on a dropper. The weight size to use is usually in the 3 to 6 ounce range.
When setting this up the rule of thumb is to have the weight be about 3 feet before the dodger, to avoid having the weight interfere with the action of the lure.
Because of that weight you’ll want a rod will a bit more of a backbone and faster action. A Lamiglas LX 86MHS X-11 would work great. On the higher end of the price range the G Loomis E6X Hot Shot rods are a good choice.
In order to determine the depth you are running at you’ll have to do some guesswork – at least initially – based on the angle of the line and amount of line out. There are several tables available online which can help you determine depth based on those two numbers.
Using metered line, like Power Pro Depth Hunter, is a great way to know how much line is out. Another way is to a line counter reel or a clip on line counter. In my experience, however, those line counter devices – built into the reel or not – eventually start having issues and doesn’t count right.
When I run braided line I like to tie on about 10 feet of mono or fluorocarbon of similar strength. This serves as a “shock leader” or “pre-leader”. The primary purpose is to avoid spooking the fish with the braided line.
Using Divers
Divers are another way to get down to the right depth. Deep Six divers and Dipsy Divers are great examples of that method. Divers are rated for a given depth, so you will want a variety of sizes to be able to achieve different depths. See the manufacture’s information on how to rig them and published depth for the sizes.
In real life there are many factors which affect the achieved depth, such as speed, drag from line and gear, and so on. I recommend, if going the diver route, that you compare the published depths with the same line angle/line distance calculations that you would use with weights. You may find that divers may be running at a depth very different than published.
Out of all three methods of getting gear down this would be my last recommendation. In part because the cost is relatively high to build a collection of different sizes. My feeling is at that point you might be in the ball park to buy a used manual downrigger.
In any case, my rod and line recommendations are exactly the same as the recommendations for using weights.
Sockeye Rigs
Like any type of fishing there are a large number of possible rigs and lures which people use. I’m going to focus on my top five rigs. These are my go to setups and all are proven fish killers.
Dodgers
All the sockeye rigs discussed below are fished in conjunction with a dodger. The dodger provides long range attraction and imparts action to the lure.
I prefer the 00 size dodgers, which are around 6 inches long – although it does vary a bit by brand. However other sizes do work as I’ve caught sockeye on the smaller 0000 (about 4 inches long) and 0 size (about 8 inches long) dodgers.
Much of the time the size of dodger doesn’t seem to matter much, as I’ve done several side by side comparisons of 0 vs 00 dodgers. In those tests there was no clear winner between the different sizes.
Personally I like the “standard” dodger, however some prefer the Mack’s Double D or the teardrop Sling Blade dodgers. They all work, and it is largely personal preference which one to use.
Generally speaking the leader length should be about 2 times the length of the dodger, so with bigger dodgers you can run a longer leader, and with smaller dodgers a shorter leader. Or you can leave the leader length the same and get different action.
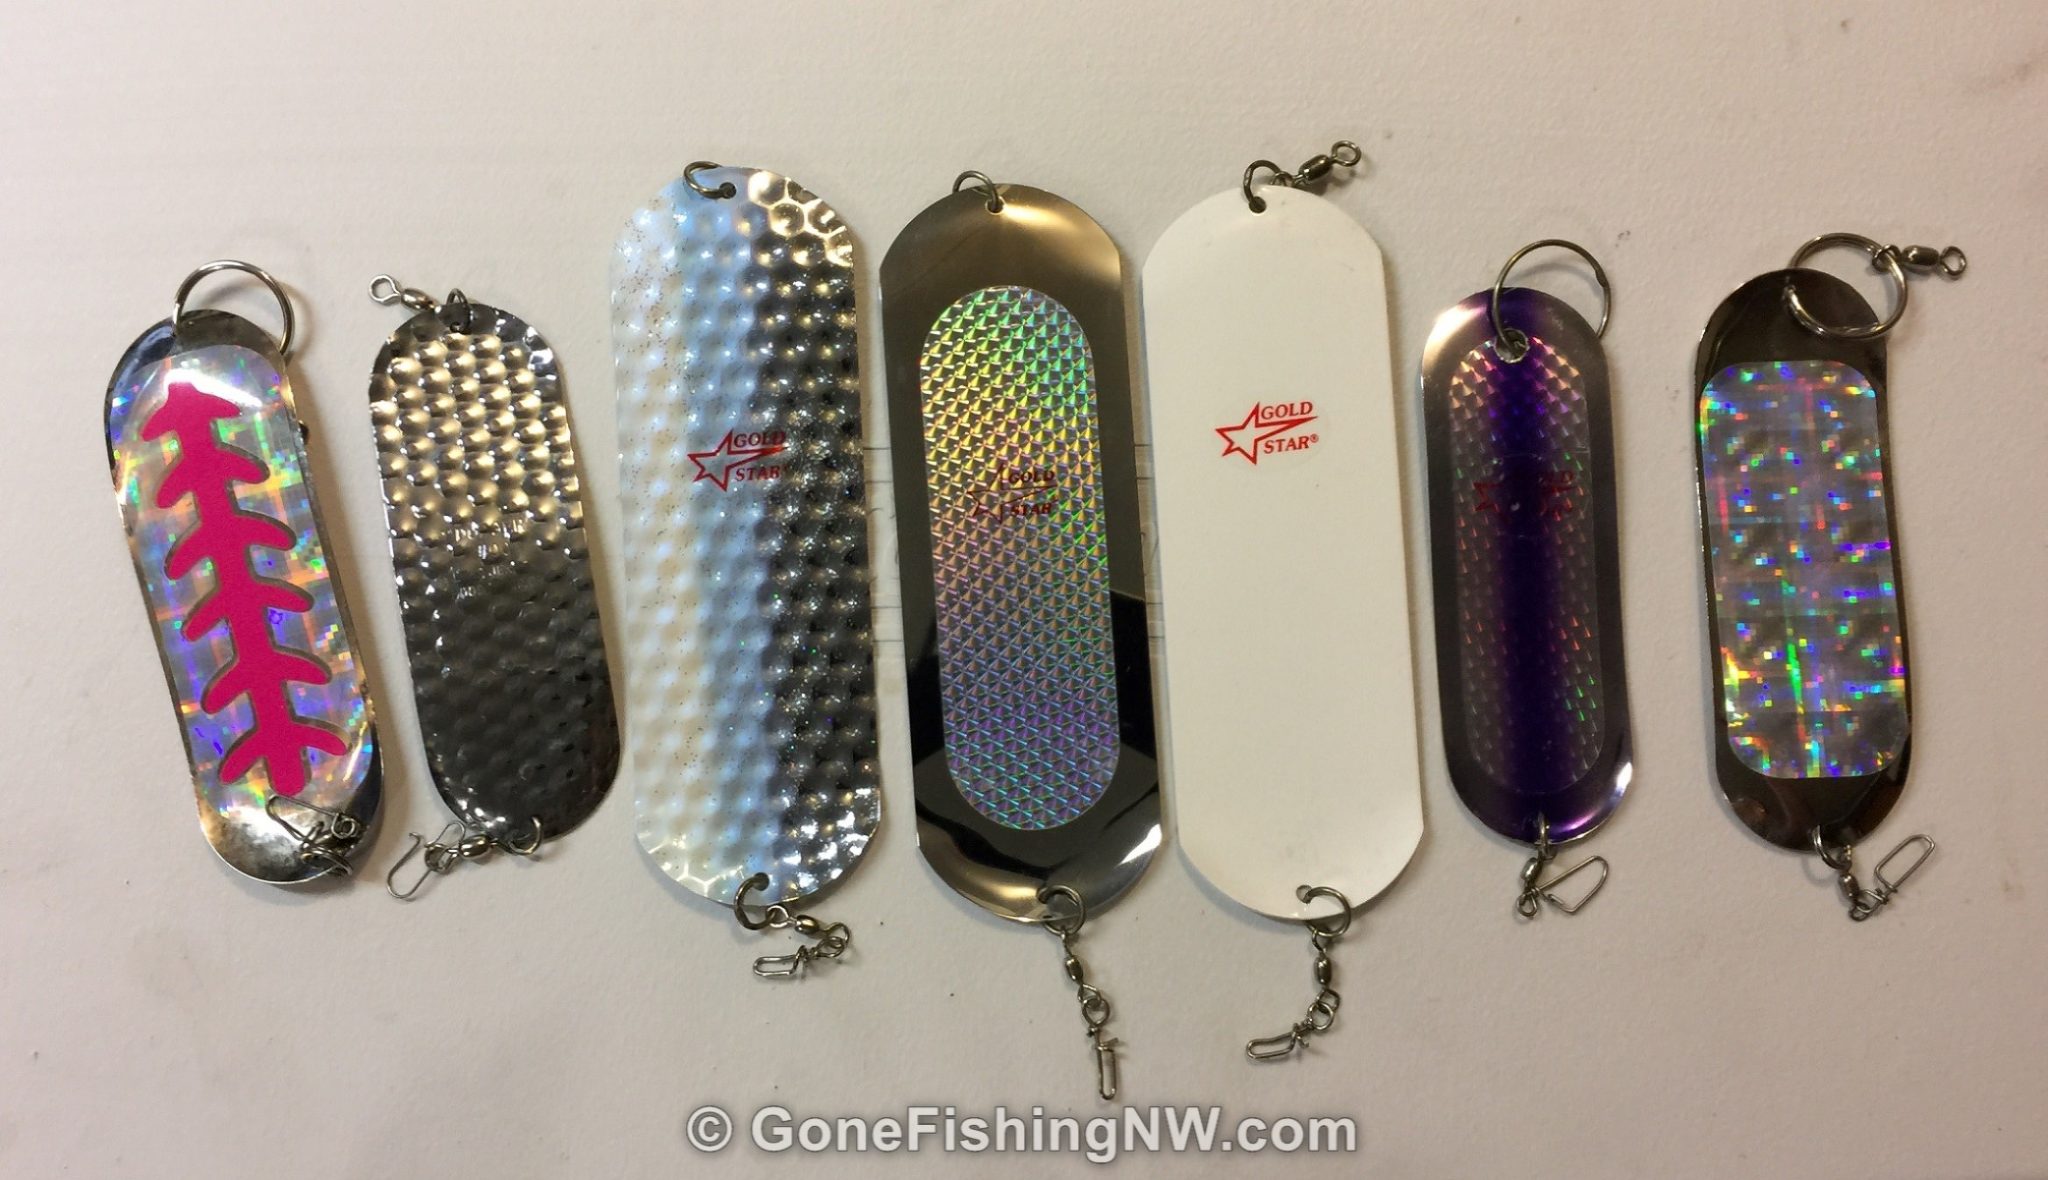
Dodgers come in many colors and patterns. If you are just going to have one dodger in your tackle box then it should be the silver scale sticker. Other patterns and colors to use include:
- Hammered Chrome (one of my favorites)
- Pink Splatter (hard to find in the larger sizes)
- Purple Haze
After you got the basics down, however, feel free to experiment. There is a reason why kokanee anglers tend to have a wide selection of dodgers…
I always had a hard time keeping my dodgers organized until I found this dodger folder, which keeps them together and is vented so they will dry off.
Bare Hook Rig
The bare hook rig became well known for the Lake Washington sockeye fishery, but I’ve caught sockeye on it other places like Lake Wenatchee, Baker Lake and Brewster Pool. There are many theories why it works, the one I like the best is that they look like little shrimp.
This simple rig consists of two 2/0 hooks, tied close together, about 13 inches behind a 00 dodger. I usually use 20# or even 30# Seagar Fluorocarbon, as the heavy and stiff line really transmits the dodger action to the hooks.

I feel that the red Gamakatsu hooks work best – there is just something about the finish of those hooks that the fish like.
To learn how to tie one up please read this article, which also includes a video.
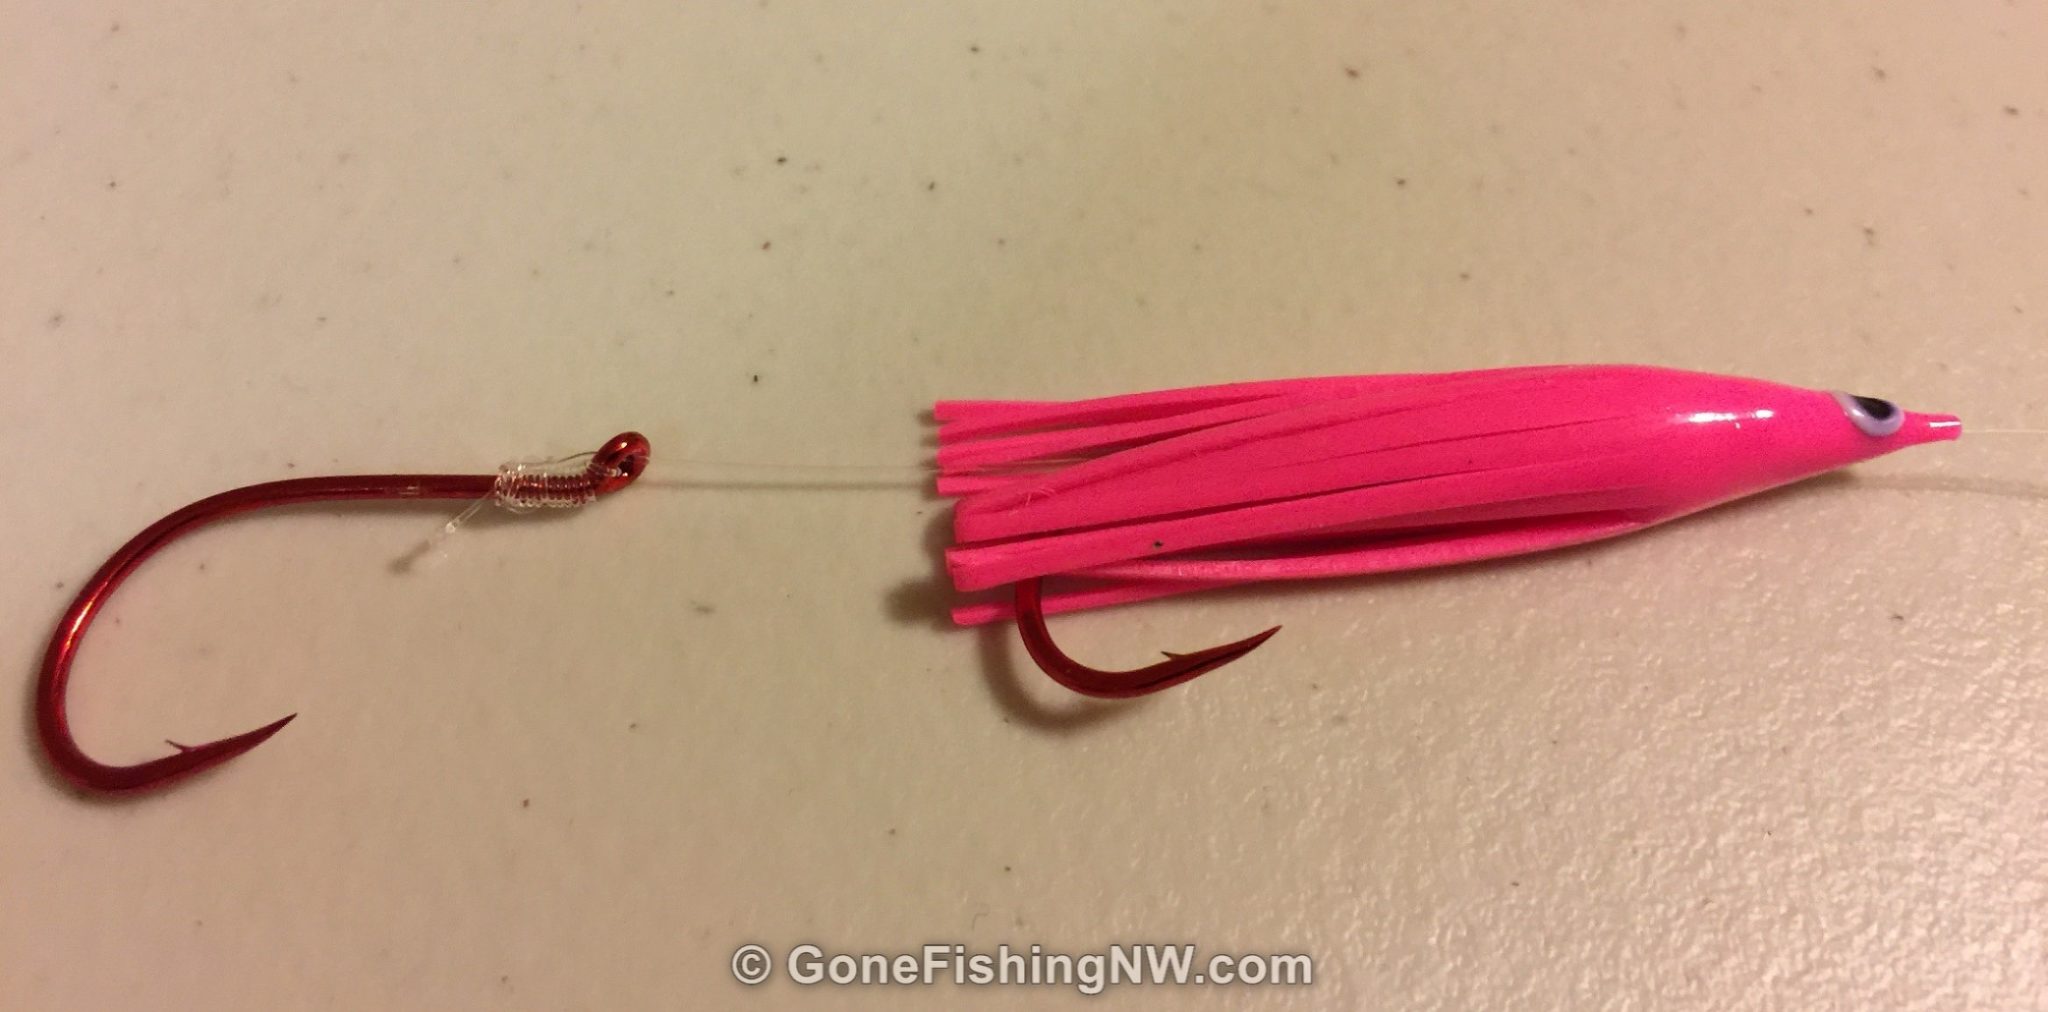
Hoochie Rig
The hoochie rig is great for low light conditions and lower visibility in the water. Many fish, and not just sockeye, have fallen prey to hoochies.
Like the bare hook rig it uses two 2/0 hooks, tied close together, about 13 inches behind a 00 dodger. I also tie this on the stiffer 20# or 30# Seagar Fluorocarbon – to get that hoochie moving action.
There are many colors and sizes of hoochies. Typically for sockeye the pink mini hoochies are used. Like dodger colors feel free to experiment, as likely there is a color combination which works well for a specific condition.
I’ve written up an article and made a video on how to tie up a hoochie rig.
NSR Rig
The NSR rig was invented by yours truly, and is the result of several seasons of refinement. It started life as a kokanee rig, which was then upsized for sockeye before being fine tuned into a sockeye killer. This is my favorite rig up at Baker Lake and has put many fish in the boat.
It consists of two 2/0 pink hooks, a stack of beads, a big spinner blade and a little bit of flashabou. I have complete instructions and video on how to tie up an NSR. Like the other setups stiff line works best, and the Colorado blade spins really well at the slow sockeye speeds.
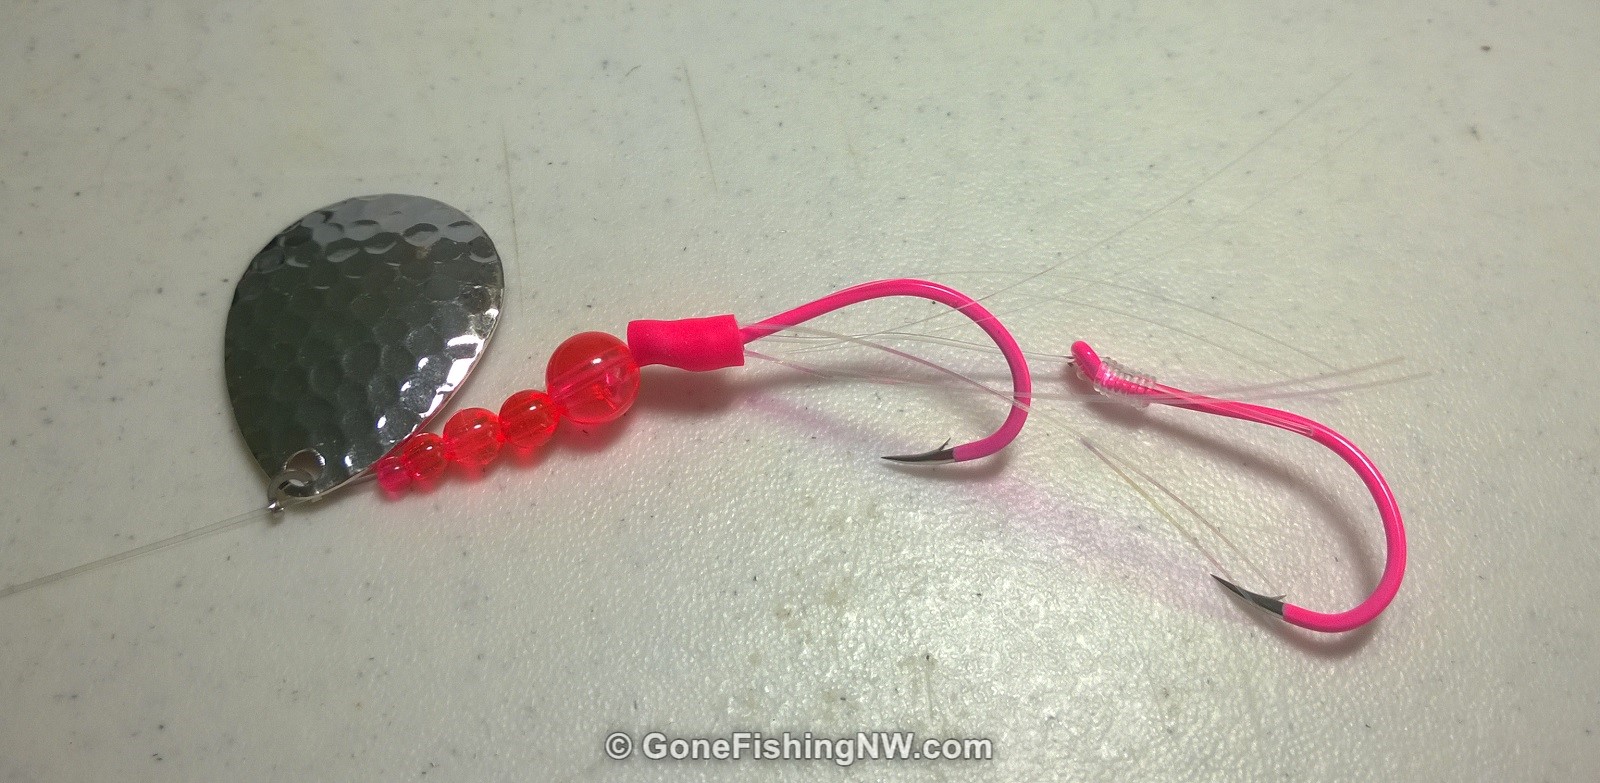
I’m a real believer in the blade being silver coated, not just nickel or chrome. Its been documented by Jed Davis how much more flash a silver blade puts out underwater.
One variation which can be killer is to replace the metal spinner blade with a 1.1 UV Smile Blade.
Rasticle Rig
The Rasticle is the brain child of Bill Herzog, a well-known Northwest angler. While the NSR and Rasticle are similar there are some key differences which I feel make them different rigs.
The Rasticle is the most involved rig to tie up, as it requires the largest variety of materials, a fly tying vice and even some painting. However, once you get some tied up they are well worth it. I always break the Rasticle out when sockeye fishing is tough.
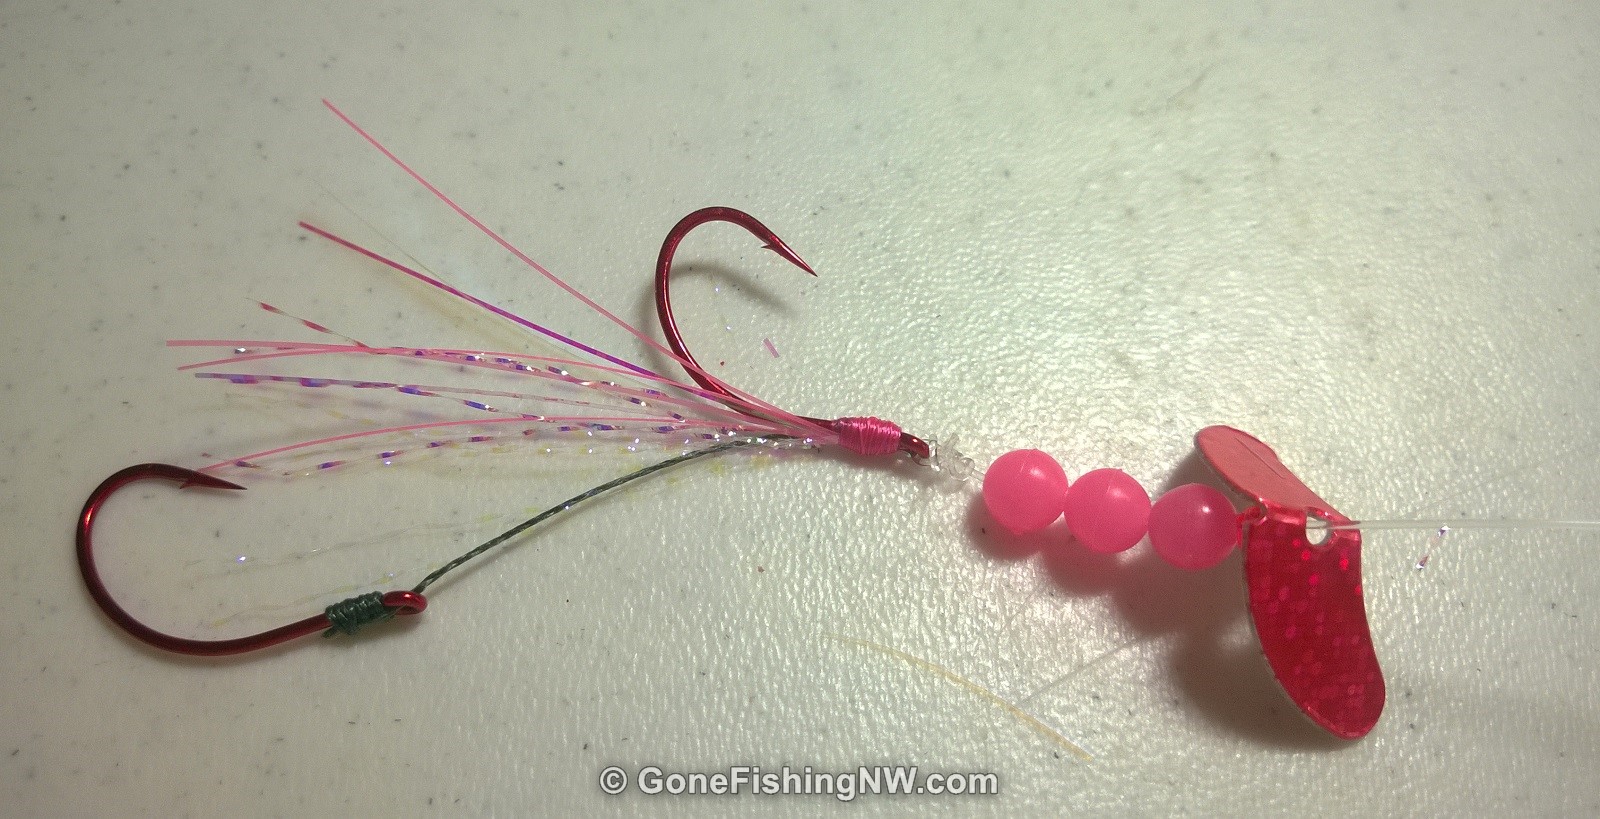
Bill’s original instructions have disappeared from the web, so here are the steps I use to tie the rasticle lure. I even made a video illustrating it.
One suggestion – if you do tie some up I suggest doing a lot at the same time. It is more efficient to do the same set of steps – like the painting – on a group of lures rather than one at a time.
Don Talbot Rig
The last rig I’ll cover I call the Don Talbot rig, or DTR for short. It was created by a Wenatchee area guide named – you guessed it – Don Talbot. I’ve never met him personally, but when I do I’d like to shake his hand since his rig has been responsible for several fish (and not just sockeye) winding up in my cooler.
It consists of 3 hooks, spaced just a few inches apart on a short leader.
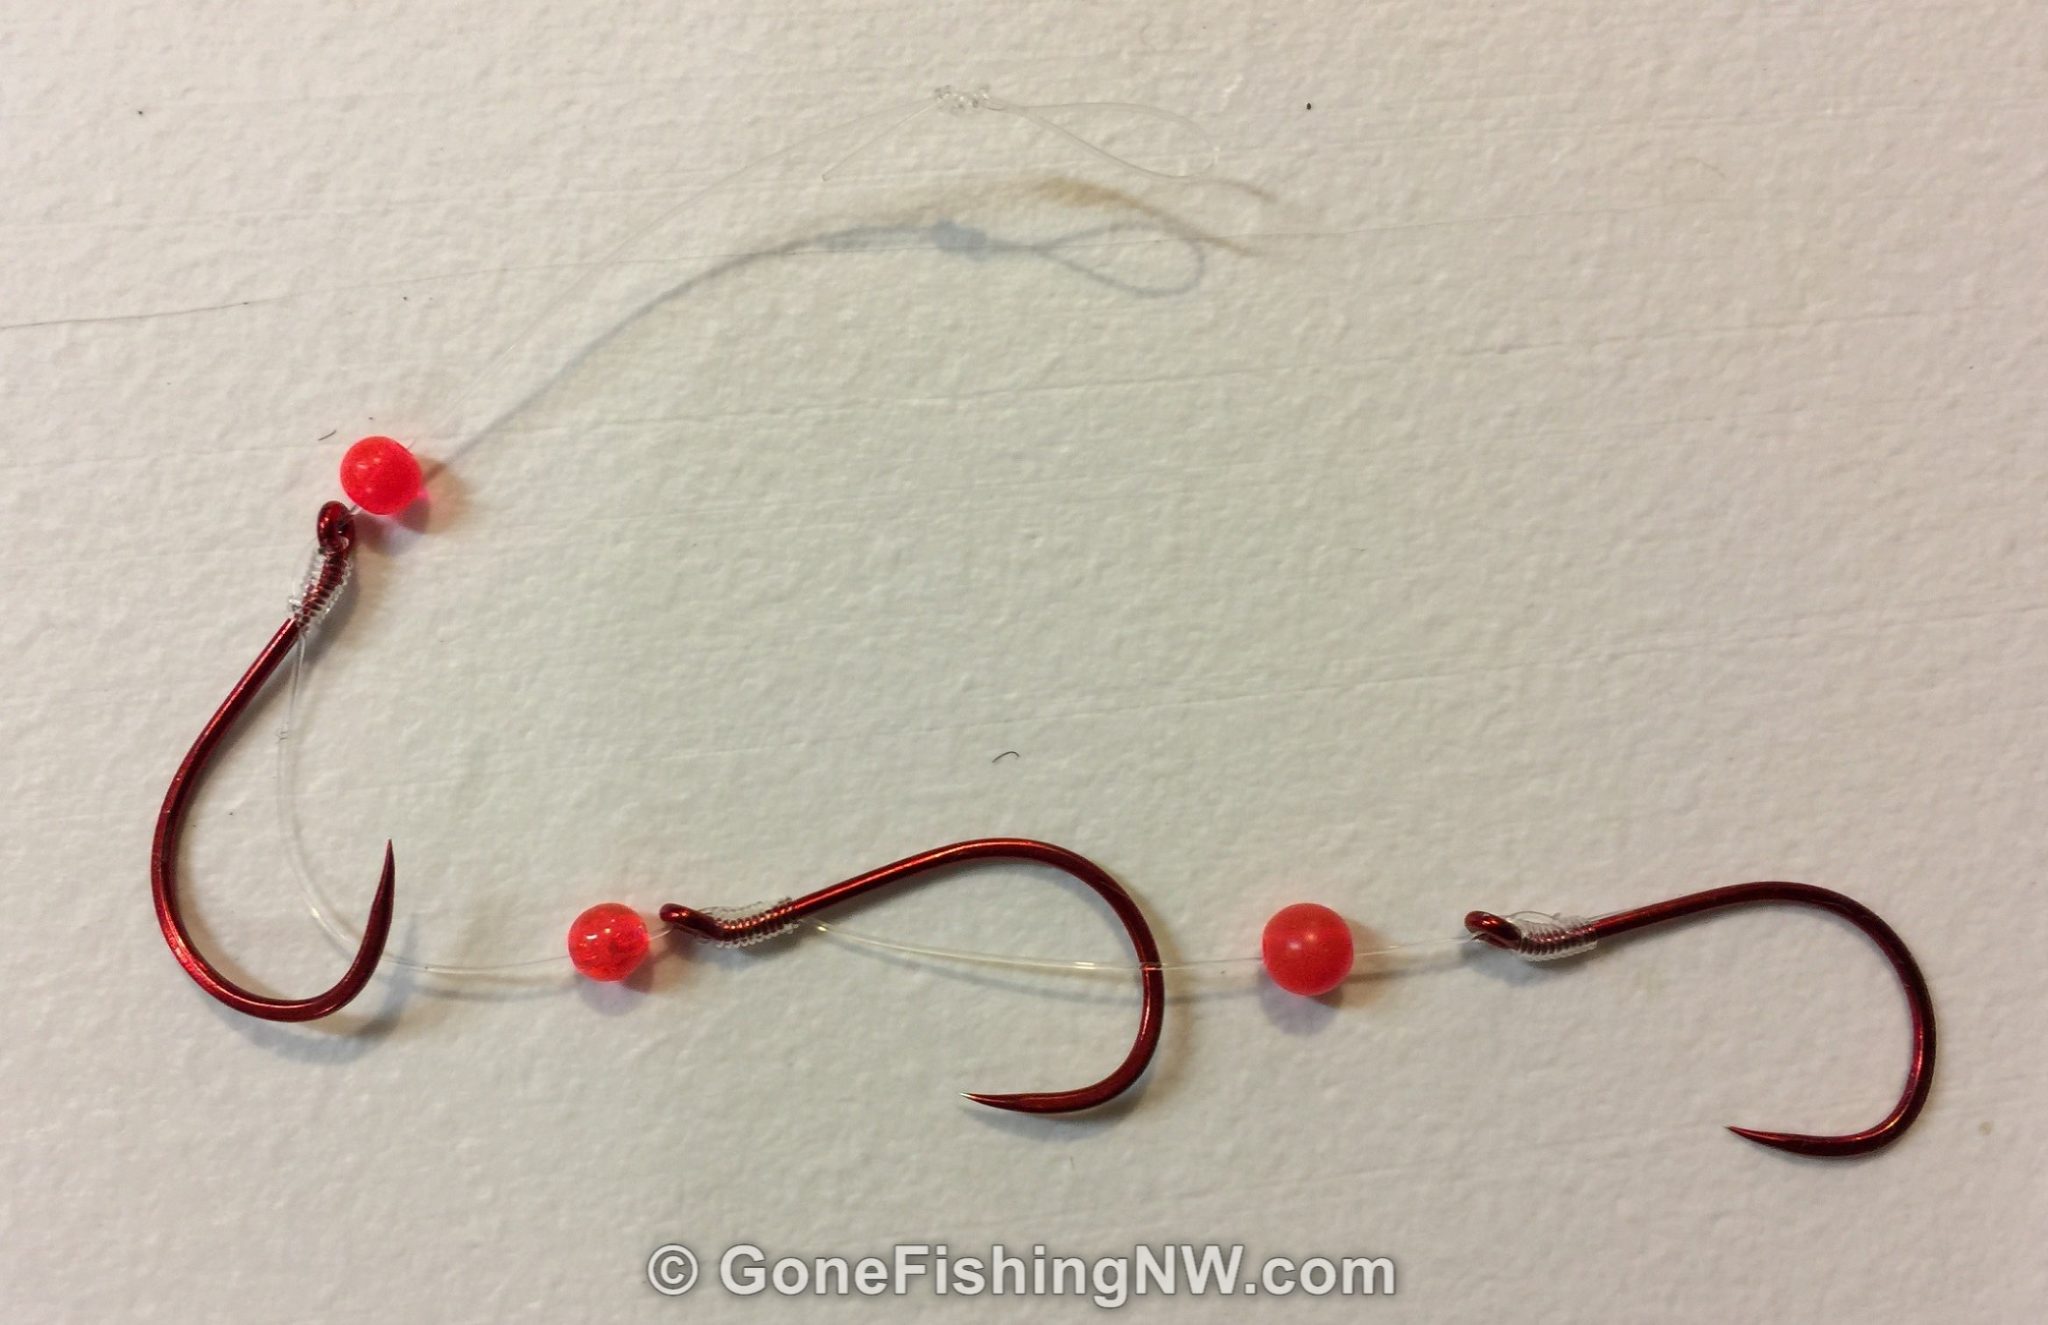
Instructions on this rig were printed in Northwest Sportman’s magazine, but if you don’t have that issue here is the quick summary.
You will need:
- Three size 2/0 Red Gamakatsu Octopus hooks
- Three red beads (perhaps 6mm)
- 20# Fluorocarbon leader material
To Tie up:
- Tie on the first hook with an egg loop knot
- Slide on a bead
- Tie on the second hook with an egg loop knot. The bottom of the hook should be about ¾ of an inch from the top of the first hook.
- Slide on a bead
- Tie on the third hook with an egg loop knot. The bottom of the hook should be about ¾ of an inch from the top of the second hook.
- Slide on a bead
- Finish the leader with a Surgeon’s Loop. The entire thing should wind up 8 inches long.
Sockeye Bait and Scent
Places like Lake Wenatchee have restrictive regulations which prevent you from using bait or scent while fishing for sockeye. This does work, but fishing is usually more effective with bait and scent.
For scent, I like using Smelly Jelly and applying just a little bit to the end of the dodger. Shrimp and krill scents are very popular and work well. Lesser well known is Crawfish (especially the 3x strong).
Garlic and Anise are good to have on board for when fishing is slow. These scents irritate the fish, causing them to strike out when not normally in the mood to bite.
The Dick Nite DNA scent is also a great choice. The kokanee scent is a great choice, but don’t forget the shad scent – which is just shrimp and krill.
For bait a small, thumbnail sized, piece of shrimp works great – you aren’t trying to feed them dinner just lay down a scent trail. I put one piece on the rig, normally on the top hook.
Most people use cured coon shrimp which is available at most tackle shops. Usually a single coon shrimp can bait up 2 or 3 rigs. Another choice is live sand shrimp; however I don’t usually use them because they can be hard to find, and don’t last on multi-day fishing trips.
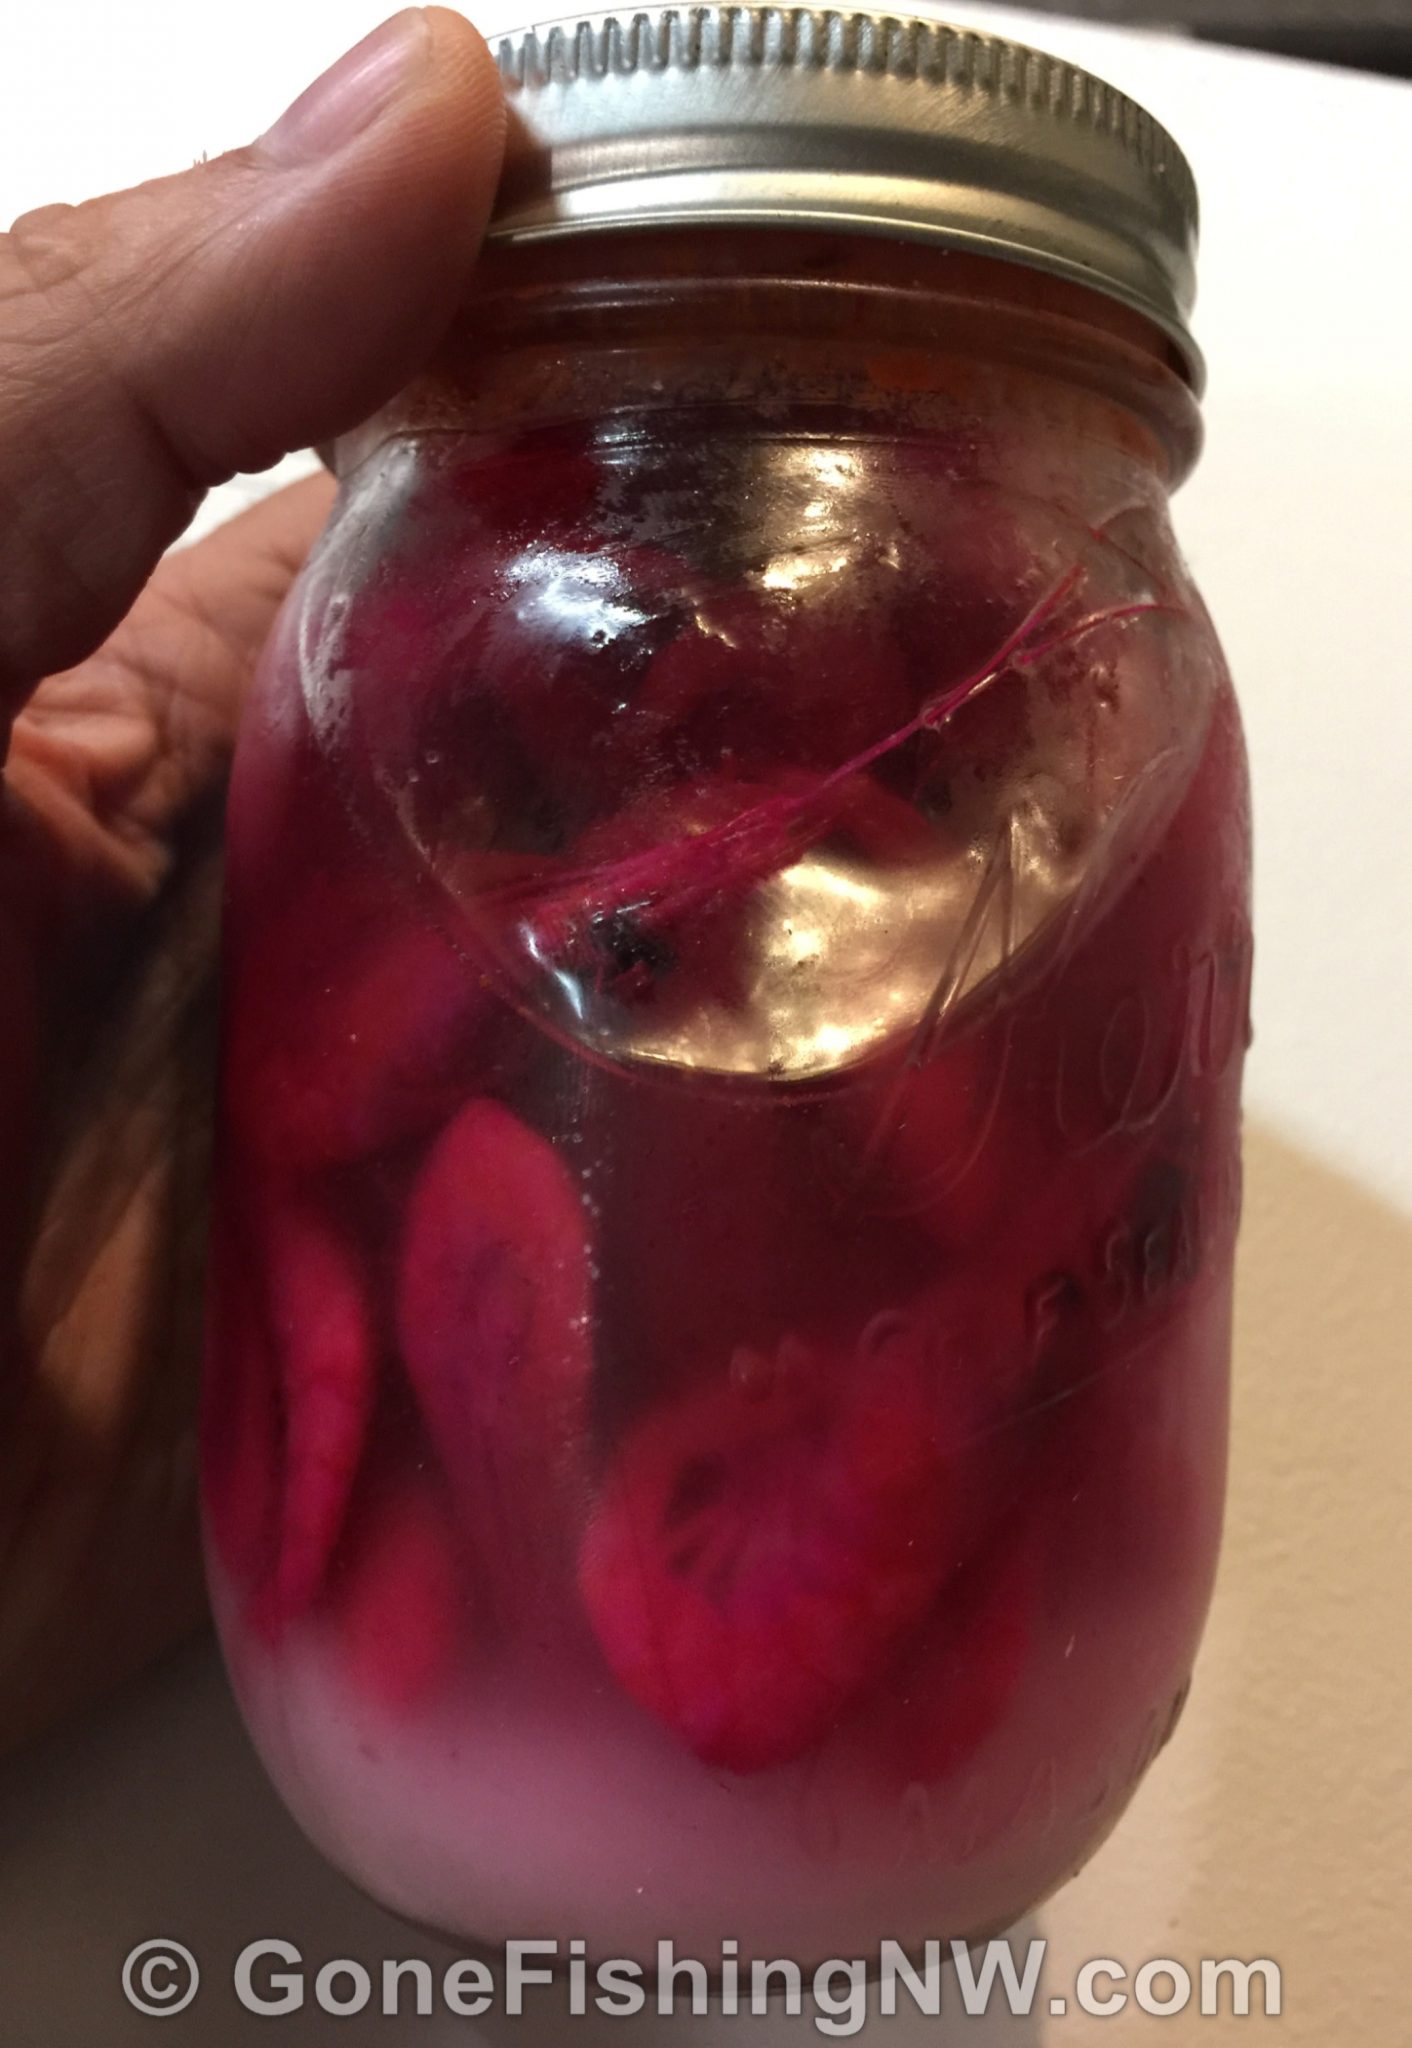
If you want to make your own bait then you can go to the grocery store and pick up some shrimp – frozen or fresh. I prefer shrimp which has been wild caught instead of farmed. I’ve used everything from large prawns to small bay shrimp with success.
If curing my own I prefer to cut the shrimp into the desired size up front. Then I place the pieces in a bag or container and sprinkle on a generous dose of red Pro Cure Shrimp and Prawn cure. Shake it to get the cure well distributed and you are ready to fish.
If you want to try a more complicated recipe then try Duane Inglin’s Coon Shrimp.
Decoding A Lake
Now that you have the gear, tackle and bait all ready it is time to hit the water. Like other species of fish sockeye will not be evenly spread across the lake. There will be places where the fish are concentrated and even schooling together. It is at that location you want to fish.
Many spots are well known and even a first time angler can easily find them. Some of these spots are documented online (including the sockeye page on this site), in sportsmans magazines and online forums. Or just skip all that prep and head to where you see the most boats fishing.
But what do you if those spots aren’t paying off? Or if you just want to get away from the crowds? Well there are very likely other spots with fish and not many boats. For example one time I was at Lake Wenatchee in a spot away from the crowds and we had trouble keeping 4 lines down because of all the bites we were getting.
In my experience sockeye like plenty of water beneath them, so start off by finding the deeper waters in the lake. In addition to the middle of deep areas, the deep size of drop-offs can be very productive.
Identify possible areas using bathygraphic maps – underwater contour maps – and then spend some time in those places. Cruise around at 5mph watching your fish finder. Make sure you are marking fish before putting your lines down.
The depth of the fish will primarily depend on water temperature. The hotter the water is, the deeper the fish will be. Make notes of what depths you are seeing the fish since they will likely be at the same depth tomorrow and even next year.

If the fish are relatively shallow, say less than 30 feet deep, then they can tend to move deeper as the sun gets high in the sky. This is especially true on bright day and in clear water. So, while fishing pay attention to your finder and be ready to lower your gear.
If the fish start deeper then they seem less inclined change depths significantly during the day.
How To Fish
You are now on your boat, fish are on your finder about 40 feet deep, your rods are all rigged up with 00 dodgers and your favorite sockeye rig, baited and scented. Now what?
Start the boat moving forward. Sockeye speed is usually 1.0-1.4MPH, with 1.2MPH being a nice sweet spot.
Next put the lure in the water and let out just a little bit of line. Watch the lure and make sure it is behaving well. If you aren’t happy with how it looks, then bring it in and fix it. Once it looks good let out a total of about 10 feet of line.
Put the line in the downrigger clip and lower it down to the desired depth – in this example 40 feet. Lower it slowly, as dropping it down too fast may cause it to tangle on itself.
If you are running multiple lines it is good to stagger the depths a bit. Also the fish generally look up, so it is better to be a couple feet too shallow, rather than too deep.
Once the line is down put the rod in the rod holder and reel in the slack. An ideal downrigger rod will be tightened down enough so it has a nice parabolic bend. A tight line will communicate the bite better and also keep things tight when the line pulls out of the clip.
If using weights or diver there is no need to tighten it down, just make sure the reel is engaged.
Fighting Your Fish
When a fish bites you’ll see the rod tip jerk down in sudden movements. When this happens remove the rod form the holder, put the rod tip close to the water and reel in until everything is tight. Then quickly jerk the rod up to pull the line out of the clip. I find it helpful to put one hand above the reel and hold both the rod and the line – otherwise the drag will sometimes slip instead of pulling the line out of the clip.
Once the line is free, keep the rod pointed high and *quickly* reel in any slack. Once you feel the line get heavy and the fish pull back, you can slow down your reeling and lower the rod to a more comfortable position.
If using weights or divers there is no clip to deal with, so just start reeling the fish in.
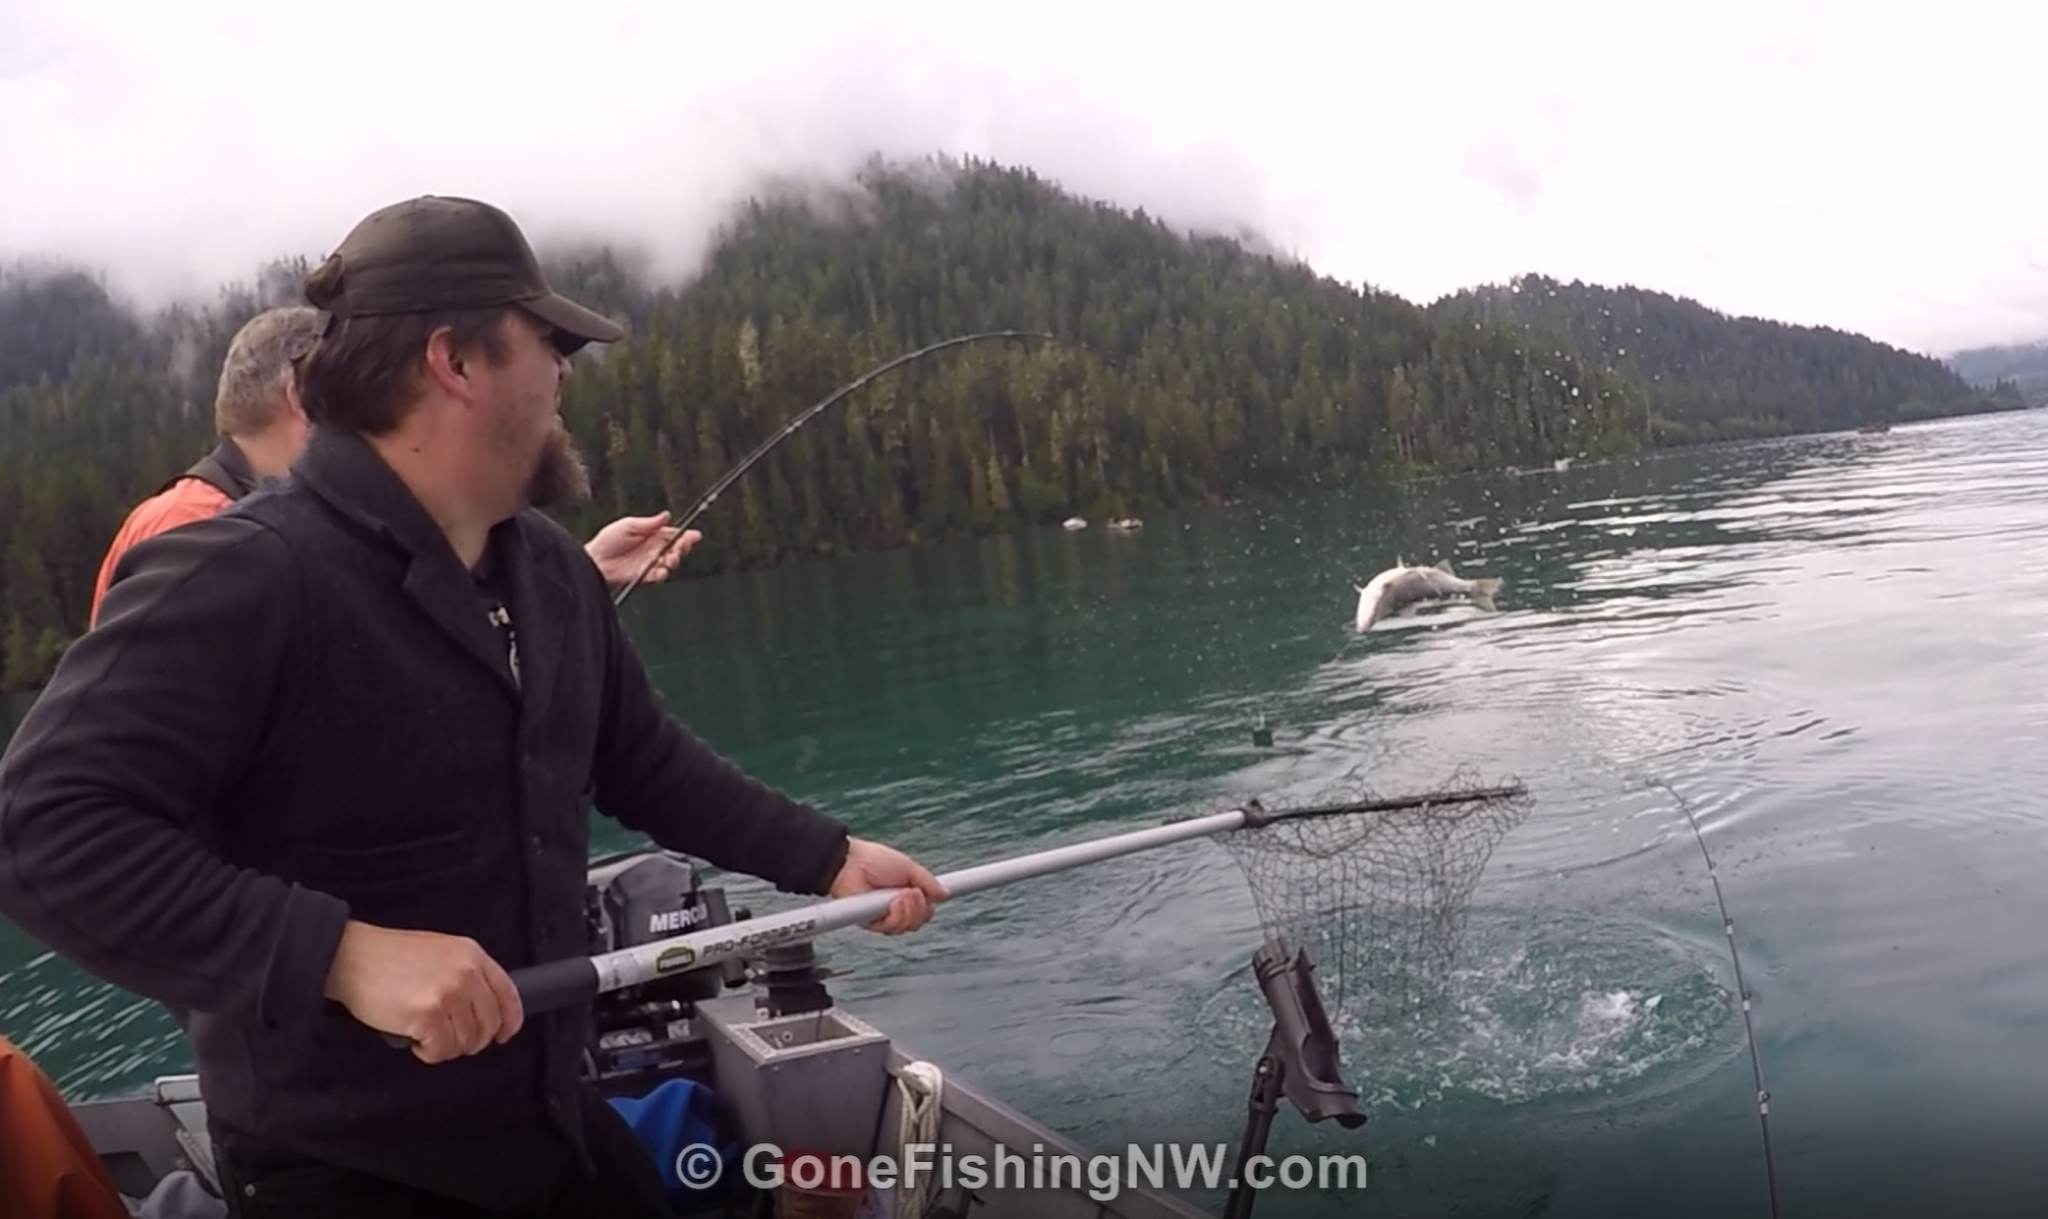
Generally speaking, you can reel in the fish at a slow to moderate pace, however if it gets close to other boats or lines be prepared to horse it a little. Sockeye will often jump a bit, or do some short runs. Let the fish do it’s thing and the rod and drag work. Focus on keeping the line tight, and reel in when the fish isn’t actively fighting.
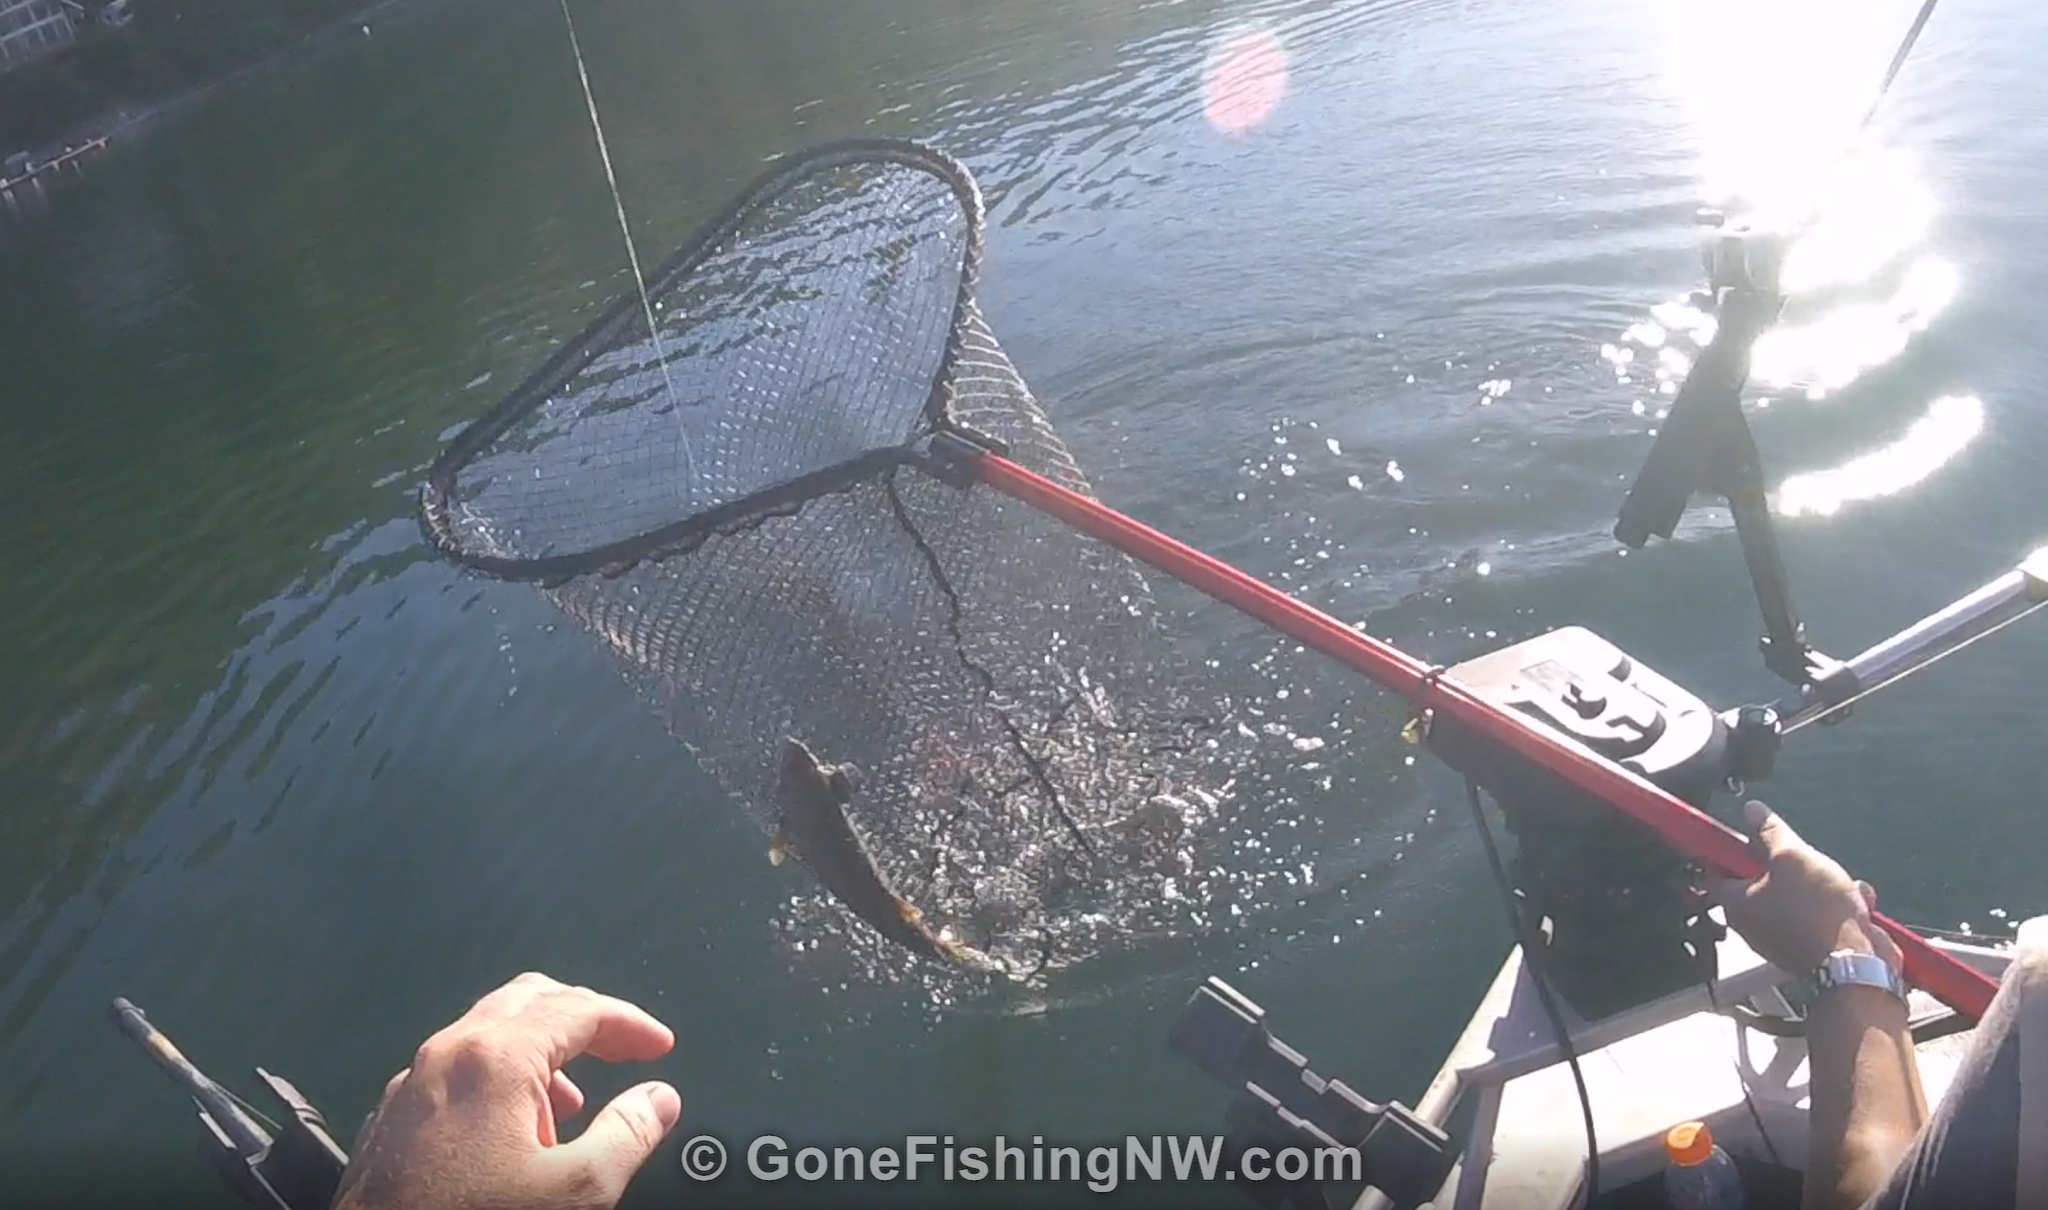
When the fish is close to the boat it is time for your buddy to net it. A large hoop and long handle make netting easier. When netting aim in front of the fish and do a dip and scoop motion – getting the hoop fully in the water before moving it towards the fish. Attempting to net a fish from behind is a great way to fail at netting, since a spooked fish will quickly swim away from it.
Caring For Your Catch
Once your fish is onboard, you can unhook it. Quickly mark the fish on your catch card and get that line back in the water – the fish can wait for a minute on the deck of the boat.
When you are ready to deal with the fish, give it a good whack on the head with your “fish bonker”. This is a humane way to kill the fish, as well as keeping it from wiggling around while you deal with it.
You then need to bleed the fish. This is important as it helps maintain the meat quality. There are a few ways to do this – how I do it is by inserting a finger into the gill area from behind the gill plate. Then I make hook with my finger around the gills and pull. The gills typically rip away from the body.
Another way it to take a knife or scissors and cut across the gills.
You’ll know you’ve done it right when a decent trail of blood starts leaking out of the fish.
Put the fish somewhere it can bleed out. If your boat has a dead well, then that is an ideal location. If not, some people will put it face down in a bucket or put it on a stringer and put it in the water.
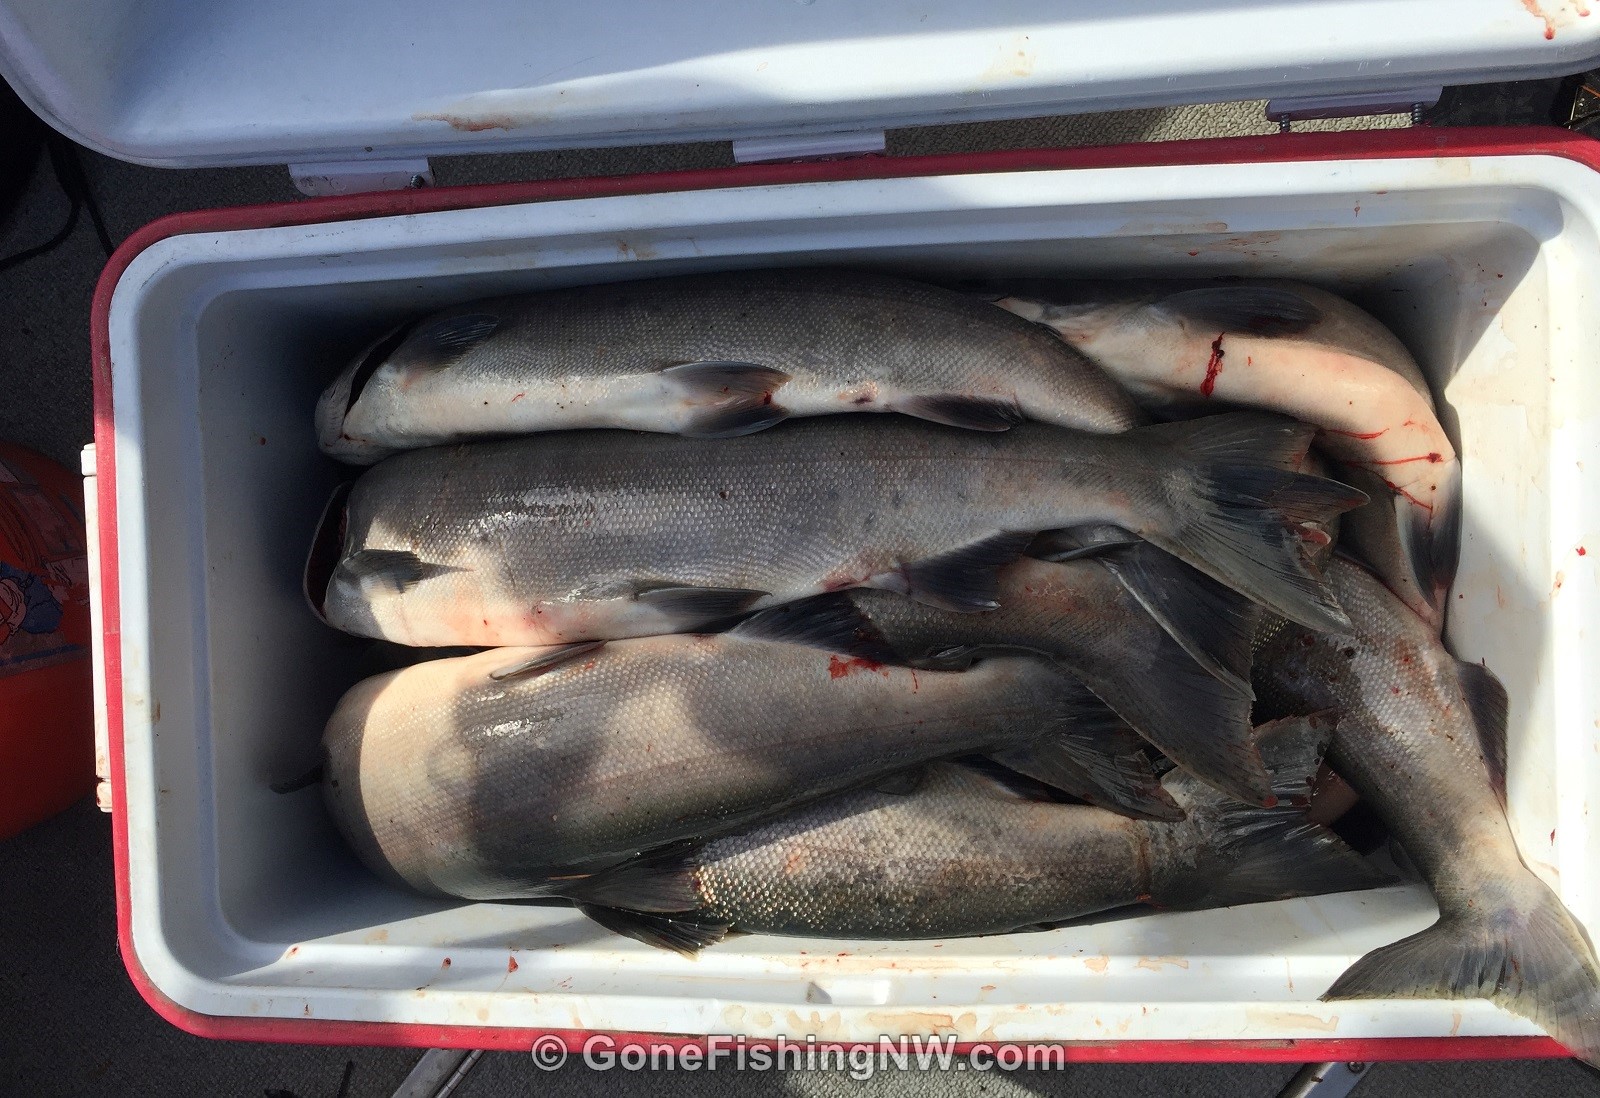
After a few minutes, it should be done bleeding out. It is best at this point to transfer the fish to the cooler where – of course – you have lots of ice. Keep it on ice until you get home, or are ready to cook it.
You may think the water feels cold and is fine to leave the fish in, but I certainly don’t want to eat a fish which spent 6 hours slowly cooking in 60 degree water.
Pro Tips
Do you have the basics of sockeye fishing down? If so here are some tips which may help you take your game to the next level.

Bend The Dodger
Are you unsatisfied with the action from your dodger, especially at slow speeds? Just put an extra bit of bend in it. This is especially effective with the teardrop style dodgers.
Start the bend slow, using the hull of the boat is needed. Generally speaking the bend should be about a quarter of the way from the back of the dodger.
This extra action can help entice fish to bite that would not otherwise give your lure a second glance.
Change It Up
Is your favorite sockeye lure not working? There can be a fine line between being confident in your gear and not responding to conditions. Maybe it caught fish the last time you were out, but today is sunnier or the water murkier.
Don’t blindly change gear, instead make an educated guess if the fish would prefer a different color, or maybe a larger/smaller presentation, more/less flash – and then change it up.
Keep notes of what worked and didn’t work for that condition, so that the next time you encounter those conditions you know what to do.
If you aren’t marking fish anymore or then change up your location.
Consider changing up your depth – especially if your finder shows that the fish have gone deeper.
Another thing to change up is your speed. Try going slower or faster and see what the fish want to bite on.
S-Curves
It is no secret that trolling in S curves can help you catch fish – but for some reason most people troll in straight lines.
Assuming you have room, do some S curves.
I turn 90 degrees in left direction and hold course for a few minutes. Then I turn 90 degrees right and hold that course for a few minutes. Then another 90 degree turn to the right for a few minutes. Lastly a 90 degree turn to the left. That completes one S curve. Rinse, lather, repeat until you reach the end of the trolling area – or limit out.
The turns should be reasonably tight, as part of the goal is for the inside rods to slow down and outside lines to speed up.
Many times, I’ve had sockeye (and other fish) hit my lines during or right after a turn. If you notice a patter – like the inside rod always gets hit – that might be a clue that the fish prefer a speed that is slower (or faster) than you are maintaining. Mostly though I think they like the change in speed.
If lots of other boats are around and you can’t do S curves, then you can do the next best thing. Goose the throttle every once in a while to do a quick 10 second burst of speed.
You can also quickly stop the boat by throwing it into reverse occasionally. Wait about 10 seconds and then resume your normal speed.
Hit Them Again
Nothing makes me chuckle like watching someone trolling hit a fish, and then proceed on their way like nothing happened. Guess what? Where there is one fish there are usually others.
After landing a fish and getting your line back down, make your way back to where you hooked the fish.
It can be hard to know exactly where that spot was. These days the easiest thing to do is to use the GPS on your fish finder to mark the spot. Most finders have a quick way to make a waypoint at the current location. So before you grab the net for your buddy mark the spot.
If you don’t have a GPS then a low tech way is to have some kind of buoy. This could be an old crab buoy, or even a painted milk jug with some weight tied on it. Throw that overboard when you have a fish on. Then turn around and pick it up while trolling through that spot again.
Don’t Reel Up Immediately
Sometimes you’ll want to pop the line off the downrigger without a fish on it. It could be to do a bait check, or change the lure or move to another spot. When you pop it off the clip don’t reel in immediately. Let the line remain slack until the forward motion of the boat makes it tight again.
This change of speed and gradual sinking of the lure can trigger a strike – just like S curves or throttle changes.
It is very fun to “help out” your buddy by volunteering to bait check his line and wind up with a fish on.
Always Have Extra Rigs
Sockeye are known for being hard on your rigs. While fighting sometimes they will roll up on the line, messing up your leader. Or maybe that second hook catches on part of the net and the weight of the fish as you lift it out of the water will cause the leader to break.
Because of this it is a great idea to have several extra rigs tied up for each kind you are using. Then when something like that happens you can quickly detach (or even cut) the leader and put the spare on. That way you can get your gear back into the water sooner. It might not guarantee a fish, but having your lure in the boat guarantees you will not catch one.
Sometimes I even go a step further and have the spare rig already attached to a spare dodger, so if the dodger is part of the tangle mess I can still get back in the water quickly.
Questions?
I hope you enjoyed this guide and found it helpful. Make sure to check out the Sockeye page for tips, tricks and maps.
Please take a minute and to Like us on Facebook or signoff for the newsletter. That way you’ll get notified of future articles.
Please leave a comment about the article, or share your fishing tips.

Great post! In particular, I liked the photos you used. :)
What a great site. Making our first trip up to Brewster next week, first attempt at sockeye and your information has given us a great place to start and just as important, confidence in succeeding.
Thanks !!
Glad you find it useful. Good luck and tight lines!
Making my first-ever trip up to Baker Lake this next week, and the information you provide here is OUTSTANDING. Thank you for sharing your expertise. Hoping my kids (ages 8, 10, and 13) catch a few fish on a beautiful lake.
Glad you found it helpful. Good luck and tight lines!
Hey nieghbor, I’m up here in NW BC and want to thank you for youe article. I’m very new to sockeye fishing but just got a new, old boat and intend to try for my limit this year. Isn’t much but I just love pressure canning and having salmon sandwiches. God speed and shalome!
Very informative and helpful. I appreciate the details that I haven’t come across anywhere else.