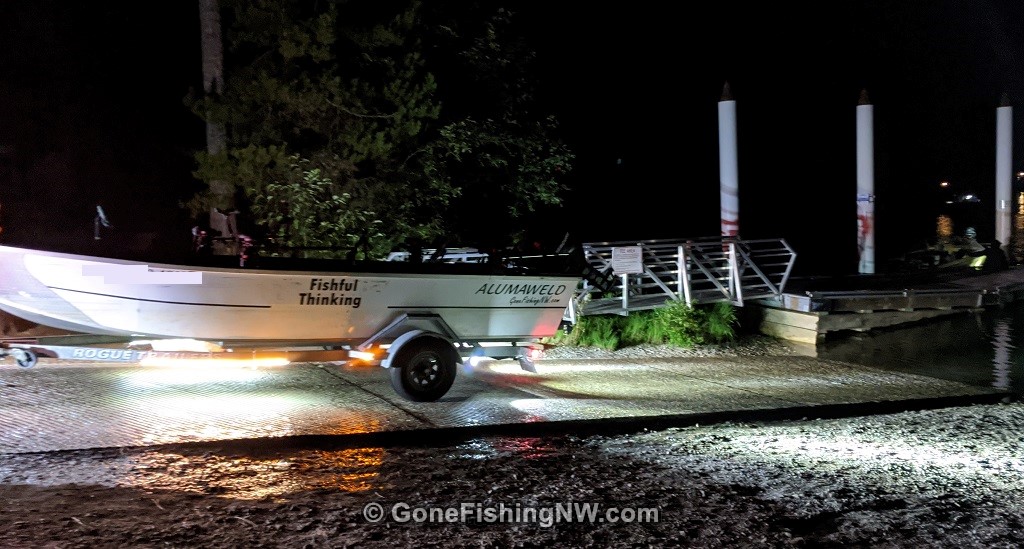
I often launch my boat in the dark, and oddly like to see where I’m backing up to. So some time ago I converted my trailer from a 4 pin wiring harness to a 7 pin, and ran an extra line through the trailer to add backup lights. The details of what I did are covered in this previous article.
I’ve found these lights helpful, but I’ve always wished they were a bit brighter. Now LED lights have improved and gotten cheaper from where they were several years ago, I have a good excuse to redo the backup lights and go even crazier.
Overall I’m very pleased with how the lights turned out, and they have been very helpful when launching in the dark. Plus I’ve gotten several compliments on the lights, which is always nice to hear. There are a few things I wish I’d done differently, so if you are thinking of doing something similar hopefully you can learn from me and do even better.
Running Lights
Lets start with the running lights. When I say running lights I mean the amber lights on the side of the trailer, although technically it includes the low light mode of the brake/turn signal lights.
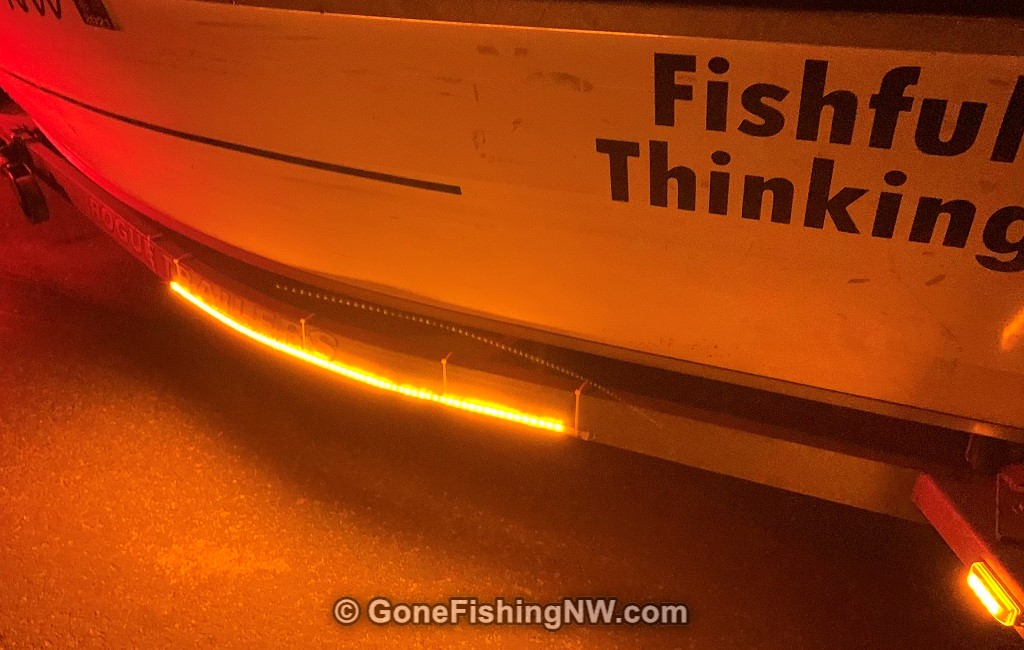
Most trailers, in my experience, have just a single amber light on each side and sometimes not even that – with just a reflector instead. Now I’ve seen big semi truck trailers with a line of amber lights along the side. I wanted something similar to that. Having worked with LED strips in the past I thought it would be perfect.
On the advice of someone I went with a non-waterproof amber LED strip, which I then put into a waterproof tube. The advantage of this approach is that I could make the strip to the length I wanted. It was also my understanding the waterproof tube works better than the LED strips with the built in waterproofing.
In hindsight I wish I had gone with a ready to go solution, such as these truck running board lights. To start off with it is extremely hard to get a long LED strip down the tubing. The friction of the led against the tubing builds up after a foot or so, and there is nothing easy to tie the string to. Once you do manage to get the LED through the tubing, you need to put a cap on each end – and solder the wire leads on. I used clear silicone caulk to attach the cap to the tubing.
Once all that was done I positioned the tubing on the trailer. More clear silicone caulk was used to adhere it. I used zip ties every 18 inches or so to hold it in position while the caulk dried. I intended to remove the zip ties afterwards, but decided to leave them on to ensure the lights were secure.
I then wired it up so it had power – more on this process later.
Backup Lights
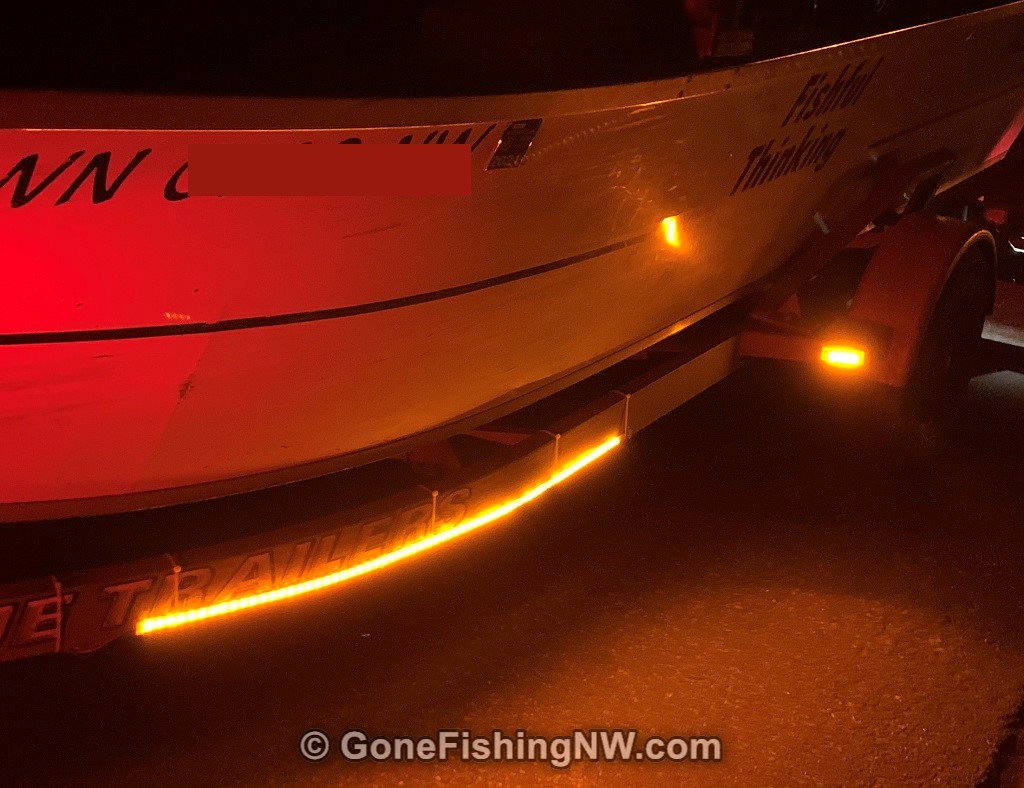
The backup lights were the main improvement I did in this project. I wanted several sets of lights – lights on the fender (like I currently had), some lights on the back and some in the front part of the trailer. I’ll go through these from front to back.
The front lights I made in a very similar way to the running lights, only with a white LED strip. I had the same difficulties with getting the LED strip through the tubing. I attached it to the trailer in the same way. In fact I mounted it right underneath the new running light strips, which allowed me to share the ground connection.
For the fender lights I selected a pair of LED flood lights. I started by removing the existing lights. In removing the old lights I cut the wires close to the old lights, which would let me later reusing that wiring for the new lights. When I installed those original lights I had made an L bracket for the mounting. I needed something similar so I reused that same bracket, but drilled a new hold in the middle since the new light only had a single mounting pole.

The lights went on pretty easily, and I was able to quickly attach the wiring to where I had cut the old ones out.
Now on to the last set. These took a bit longer to find the right ones since I wanted lights that would face straight back, but sit high enough on the frame to not get hit by anything when backing up as well as not interfere with launching or retrieving the boat. I went with this light bar, specifically with a 30 degree spot light arc – since I had plenty of side coverage from the other lights.
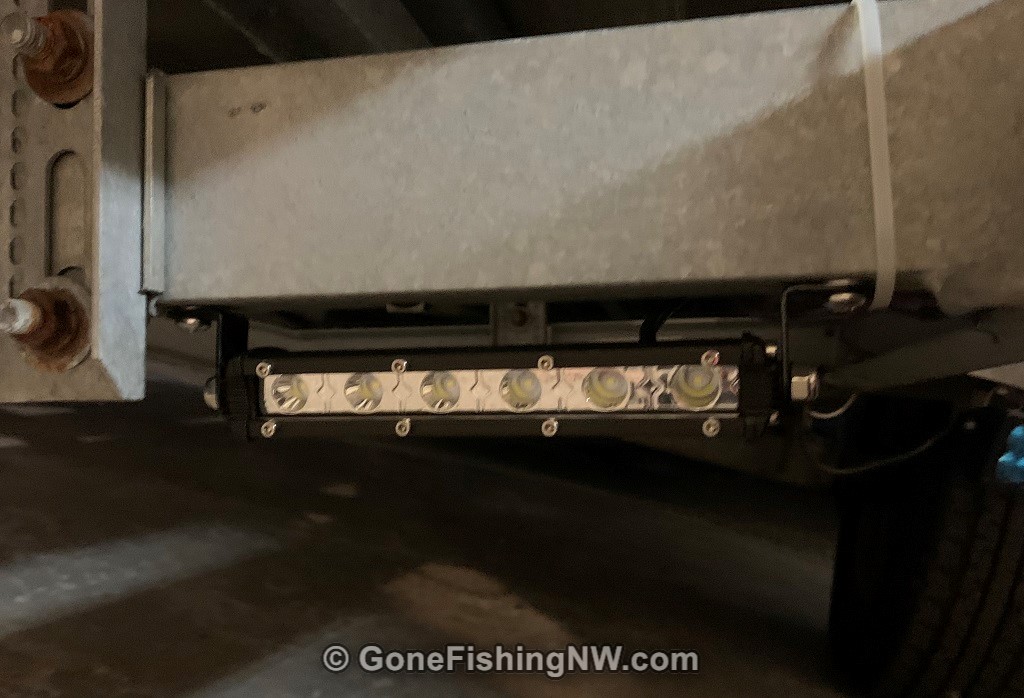
Installing these was pretty straight forward, although drilling through the hardened metal of the trailer was tough. When doing this make sure to use titanium drill bits, and start with a small hole and work your way up to the size needed. It is also very important to keep the drill straight, otherwise you run the very real risk of breaking off drill bit inside the hole. One the lights were on I had to extend the backup power line back the last few feet and connect it to the lights.
Overall the backup lights installation went pretty smooth, with the exception of dealing with threading the LED strip through the tube, and of course the cramped quarters of dealing with the trailer wiring.
Selecting Lights
There are a few things to know when selecting the lights for your trailer. Not only will a boat trailer be exposed to rain and wet roads, like any trailer, but will also get submerged regularly in water. So you first need to make sure you are selecting waterproof lights. Fortunately there is a industry standard on how waterproofing is rated. You may have seen labels that say things like IP67 or IP68 – this is the waterproof rating. You can find the IP rating completely explained here. But for our purposes we can be quite simple. You want the last number to either be 7, meaning can be submerged up to 1 meter of freshwater for 30 mins – or 8 meaning more than 1 meter for at least 30 mins. For your typical boat trailer with IP67 or IP68 should work just fine, but personally I recommend going with IP68, unless you can’t find the light you want at a reasonable price.
The next thing you want to consider when picking out your LED lights is if they are spot or flood. To state the obvious, spot lights are narrow focused lights good for brightness and distance, flood lights are for broad coverage and may be less bright. Some LED lights are combo models with some of the elements being spot and other flood. Unless you are mounting multiple lights, likely you want to stick with flood lights. I only recommend going with spot lights if you have multiple lights and want some to have more distance.
Lastly consider where you will mount it, and the orientation of the provided mounting hardware. The light does no good if you can’t mount it successfully in a useful location.
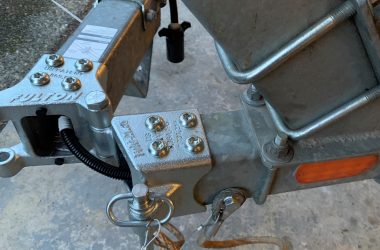
Trailer Wiring
When I described the installation, I glossed over the details of the wiring. Trailer wiring is subjected to a lot of road noise, a wide range of temperatures and of course being submerged in water on a regular basis. The wiring needs to be done right, otherwise you’ll have issues on a regular basis.
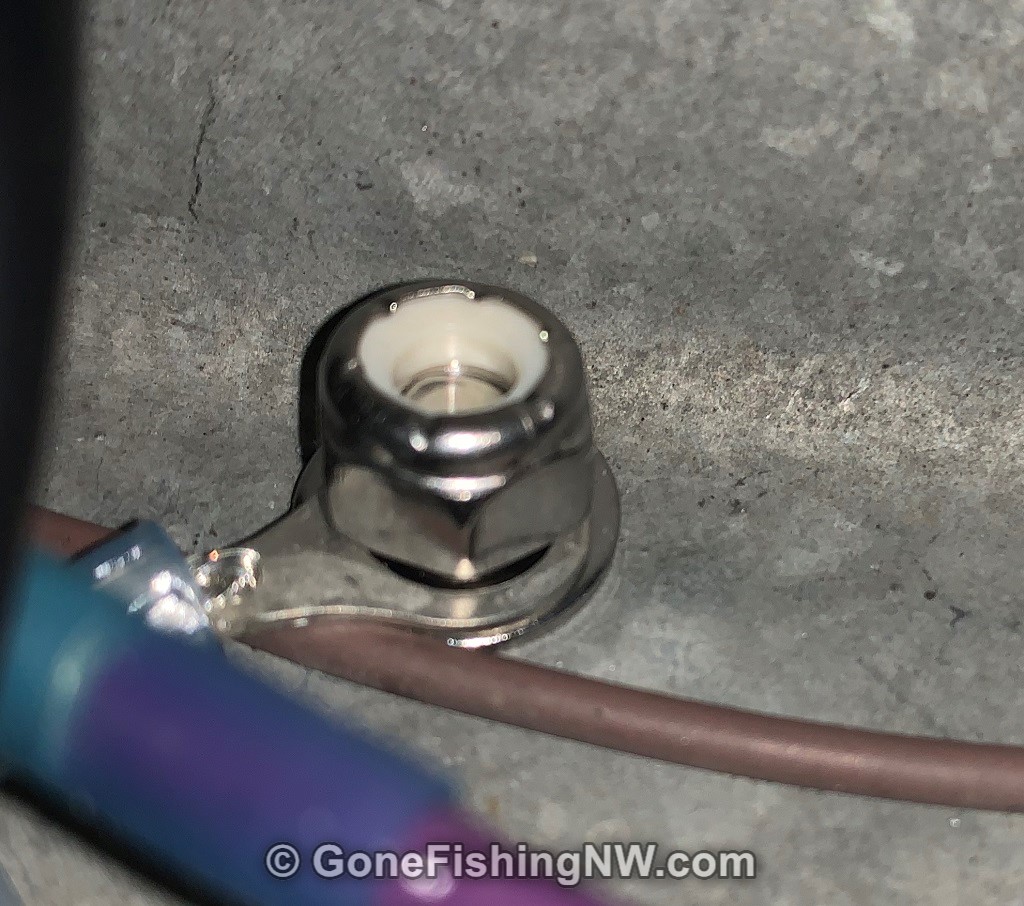
On a trailer the frame is ground, and lets cover connecting to that first. When adding a new ground connection first drill a hole for a bolt – you want the hole to be snug, but still loose enough to push the bolt through. Using a wire brush or sandpaper, cleanup the flat area on both sides of the hole. This will ensure a good connection between the nut and bolt head with the frame.
Next take the negative (usually black) wire from the light and install a ring connector on it. The ring size should be just large enough to fit the bolt shaft. If you can use a ring connector with built in heat shrink tubing, and give it a blast from the heat gun after installing it. That will give some extra strength to the connection. Then thread it onto the bolt shaft, then the bolt through the hole. Put on the nut and tighten down really well. I prefer the nylon lock nuts to keep it from working loose with road noise. This should give you a really solid connection to the frame – both mechanically and electrically.
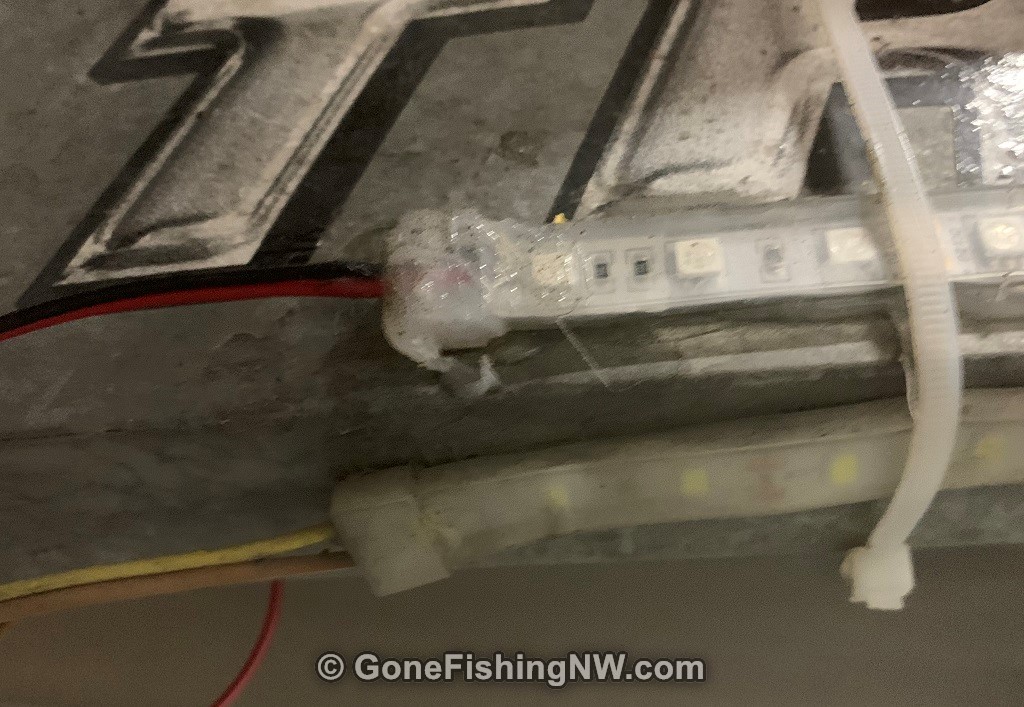
For connecting the actual power wires I prefer to use heat shrink butt connectors. If connecting just 2 wires, it is trivial. Insert one wire in, and crimp that side. Then repeat on the other side with the other wire. Then finish with the heat gun to shrink the tubing. For connecting 3 wires – such as when branching off a wire that will continue to run down the frame with a light at that location, I do it very similar – only stick two wires in the same end. Sometimes you need to go a size up for the butt connector for them to fit. If this happens then on the single wire end you can strip the wire long and double it over for a similar wire thickness for crimping.
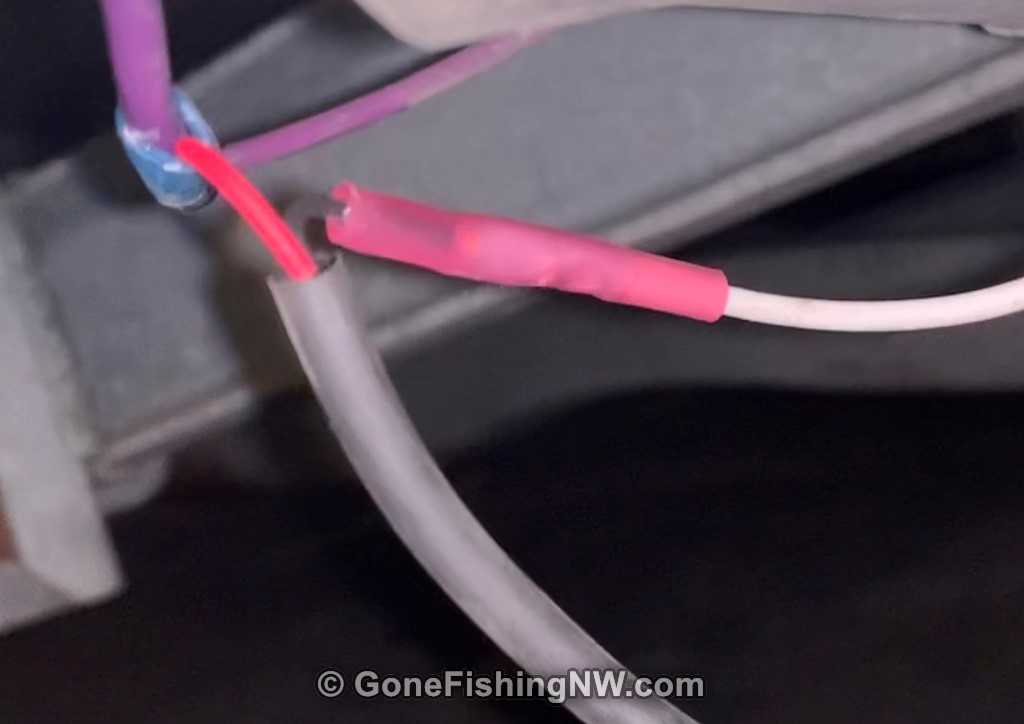
You may be tempted to use a T-tap or splice connector – in my experience, these are not as reliable and in the long run not worth the immediate convenience. The other thing I’d recommend instead of the heat shrink butt connector is to solder the wires together and secure with heat shrink tubing, perhaps supplemented with electrical tape.
Retrospective
I mentioned early on that would do some things differently if I were to do this project again. The biggest pain point was those custom LED strips.
I’ve told you about how hard it was to get the strips in the LED tubes. What I didn’t tell you already is that the waterproof tubes have issues being waterproof. I actually did this project in 2 stages about a year apart, with the LED part being the first stage. During that year I had one of the LED strips go out, and I had to build a replacement. Water had gotten in and killed the LEDs. I’m not entirely sure what happened, but I believe something nicked the tube and it was all downhill from there.
Were I to do it again I would prefer to use pre-made waterproof LED strips such as those sold for running lights for motorcycles (small) or trucks (large). Any extra cost is well worth it for the convenience as well as likely more robust waterproofing. There are even some that have white LEDs in them as well, so a single strip could do both backup lights and running lights.
Failing that I think I’d just install a few of these traditional running lights at various points on the trailer. It wouldn’t look as cool, but would be very robust.
The LED strip also suffers from not providing a lot of useful light for backing up in the dark. So going with a light bar, similar to what was used in the back of the trailer, but mounted at the front facing back. The brighter LEDs combined with the refection cones in the light would be much better.
Final Thoughts
I hope you find this project interesting and do something similar with your trailer. If you do, please come back and leave a comment about what you did and a link to pictures.
One of the most frustrating things about owning a boat is keeping trailer lights working. Wires that rust and short out, bad grounds, water leaking in and blowing out the bulbs. It seems like I have been lucky to get through a season without having to replace a set of tail lights on the trailer. I’m in my second year with these CZC trailer lights and so far no problems. No blown fuses and both lights are just as bright as when I first installed them. I even paid less for the LED than I have for the old-style lights in the past!
Thanks for great post.