Nothing is sadder than having a fun day of fishing planned, then having that fun interrupted or even canceled outright due to a lack of maintenance or sloppy workmanship. Complete maintenance for boats and trailers is a long subject, so I’m going to focus on a single aspect – electrical. Specifically, the basic electrical connections and wiring that tie everything together.
Road and marine conditions can be tough, and the wiring equipment, parts and procedures that work in your home wiring will break down in those conditions. Don’t worry though, it isn’t hard to do things in a quality way that will be dependable and last.
Use The Right Parts
The first thing is to make sure you are using the right parts.
Use marine grade wiring. This wiring is different from other wiring. It may cost a little more, but it is worth it having less issues and lasting longer. Some significant differences are:
- Made up of more, smaller strands of copper – which make it more flexible when running through the tight spots, or where it may have regular movement
- The wire is tinned – which is an anti-corrosion coating
- The isolating plastic is higher quality – more resistant to gas and other corrosive elements
Marine grade heat shrink tubing has extra adhesive inside to secure it and make the seal waterproof.
Similarly make sure other parts are also marine grade.
Connecting Wires Together
Occasionally you will need to connect two wires together – end to end. For example, you may need to connect wires to the “pigtail” of wires coming out of a light or other device.
Twisting the wires together and using a twist cap is a guaranteed fail. It is not waterproof and vibrations can shake it loose.
If you must go quick and easy then use a heat shrink butt connector. You strip each wire just enough to fully seat inside the metal part of the connector. Once it is fully inserted on a given side then use pliers or a crimp tool to smash the metal around the wire. This will hold it in position, and secure the electric connection. Repeat using the other wire on the other side. Then use a heat gun (or just a lighter) to shrink the tubing around the wire. This will waterproof it and further secure the wire in position.
However I prefer to an even better connection, which is to solder the two wires together. This takes longer but the result is a very strong and durable connection.
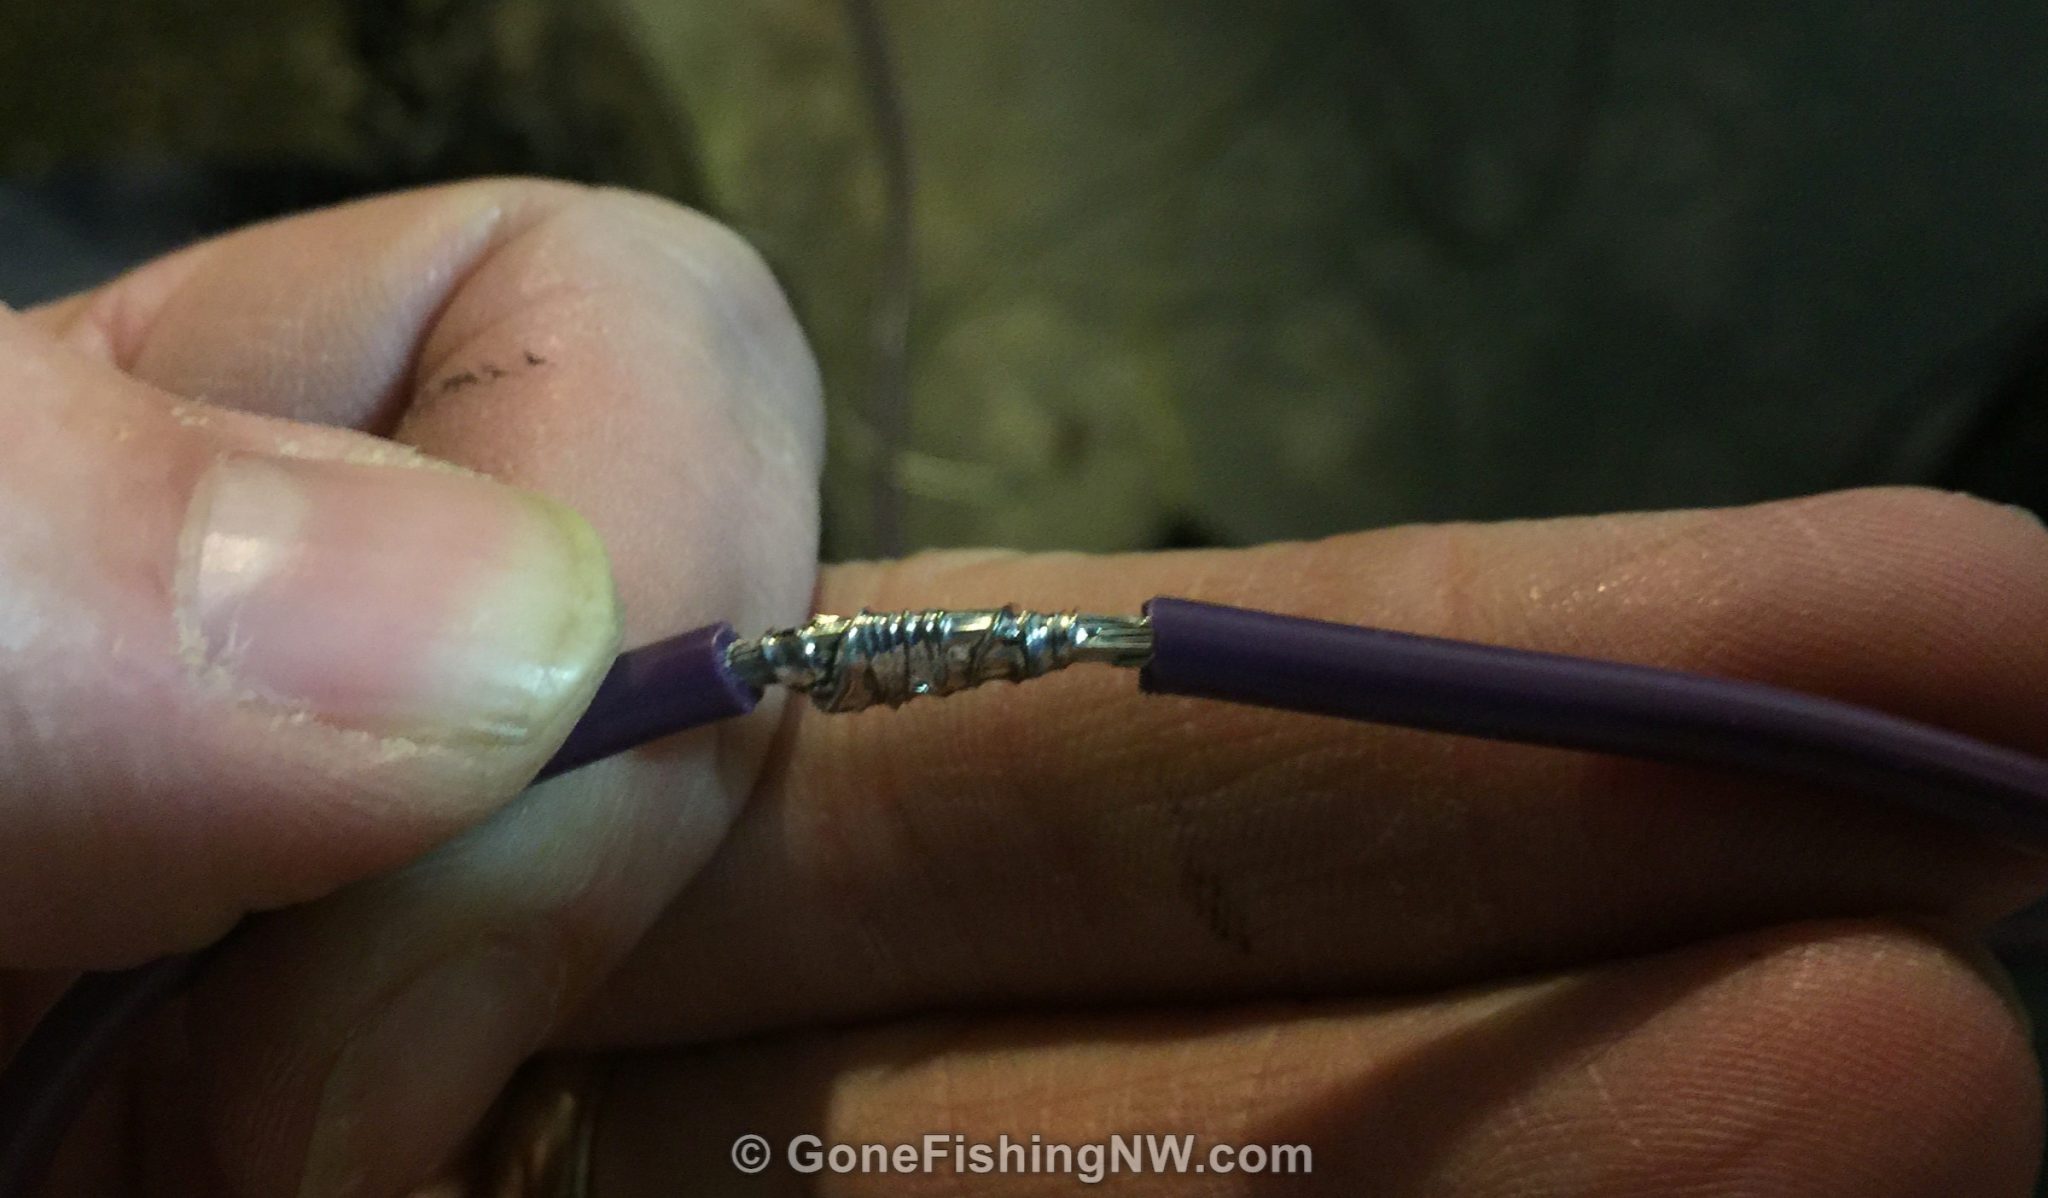
Here is some wiring I did to extend the wiring harness on a trailer. This is the standard way I try to connect any two wires together.
First, take the ends of the two wires and strip off about 1/4 of an inch. Then take the two ends and push then directly into each other – letting the strands mix across the width of the wire. Next I use a spare strand of wire to wrap the connection together. This both mechanically secures the wires together, and bundles it together with a profile just a bit bigger than the wire.

Second, heat up your soldering iron. Once it is hot, place it directly on the join between the wires. After apply a modest amount of rosin core solder. The solder will melt and start coating the join. I’ll then move the soldering iron to press against the bottom of the join. This will help the solder to penetrate the inside of the join.

Third, I coat the exposed wires with liquid electrical tape to waterproof it. Dab on a little at a time, unless you like having it drip all over. It will take several minutes to completely dry.
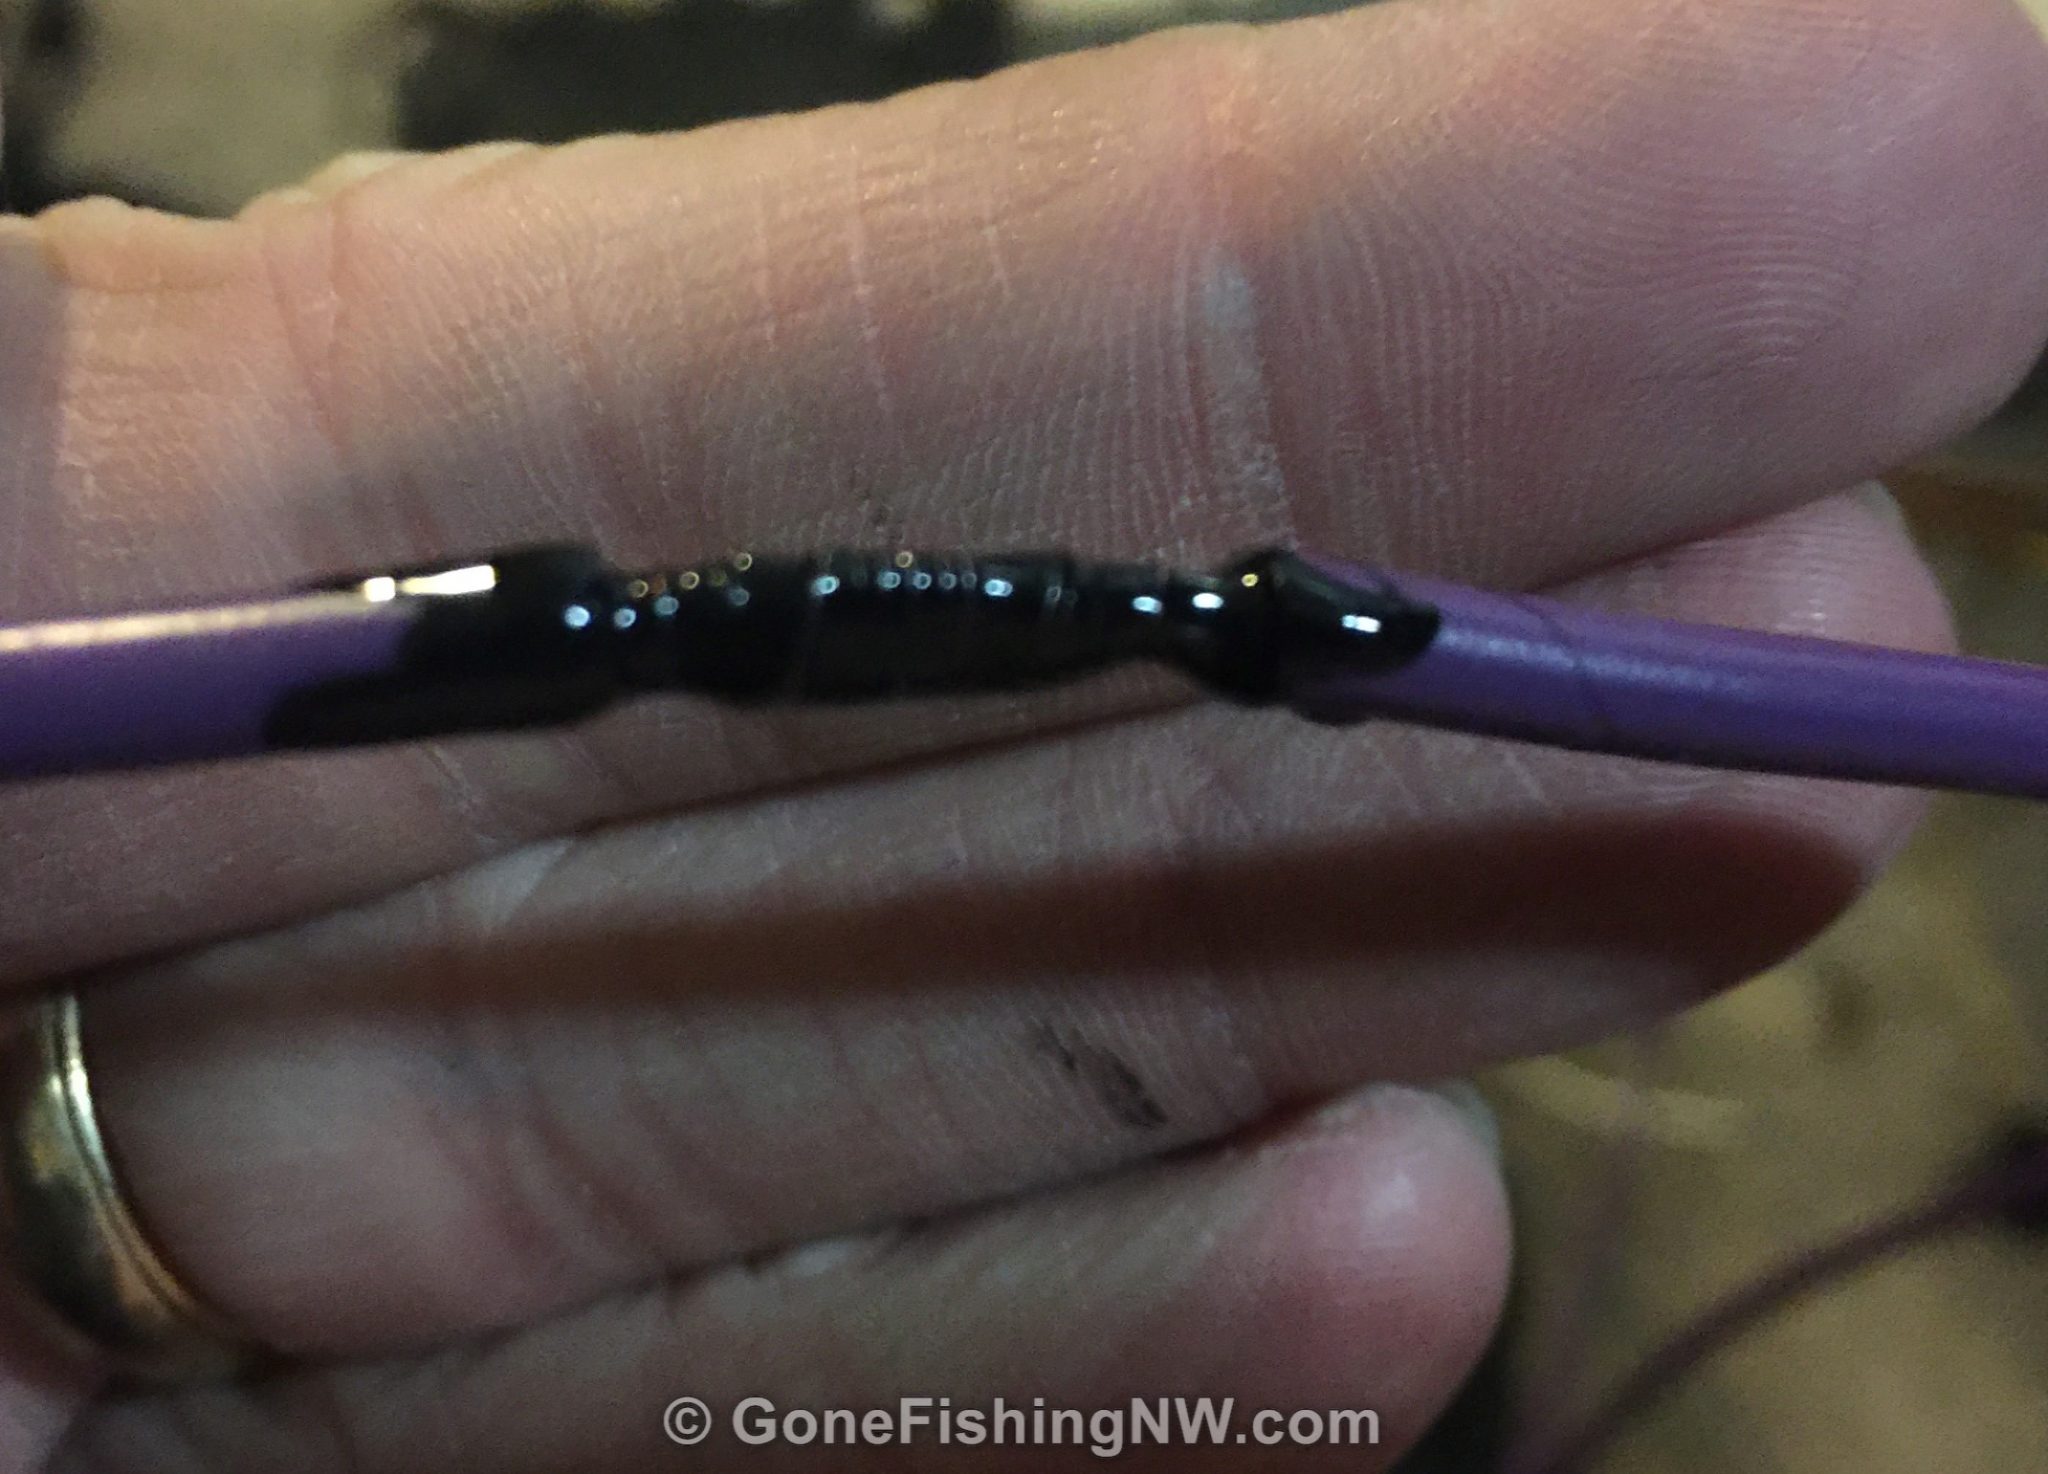
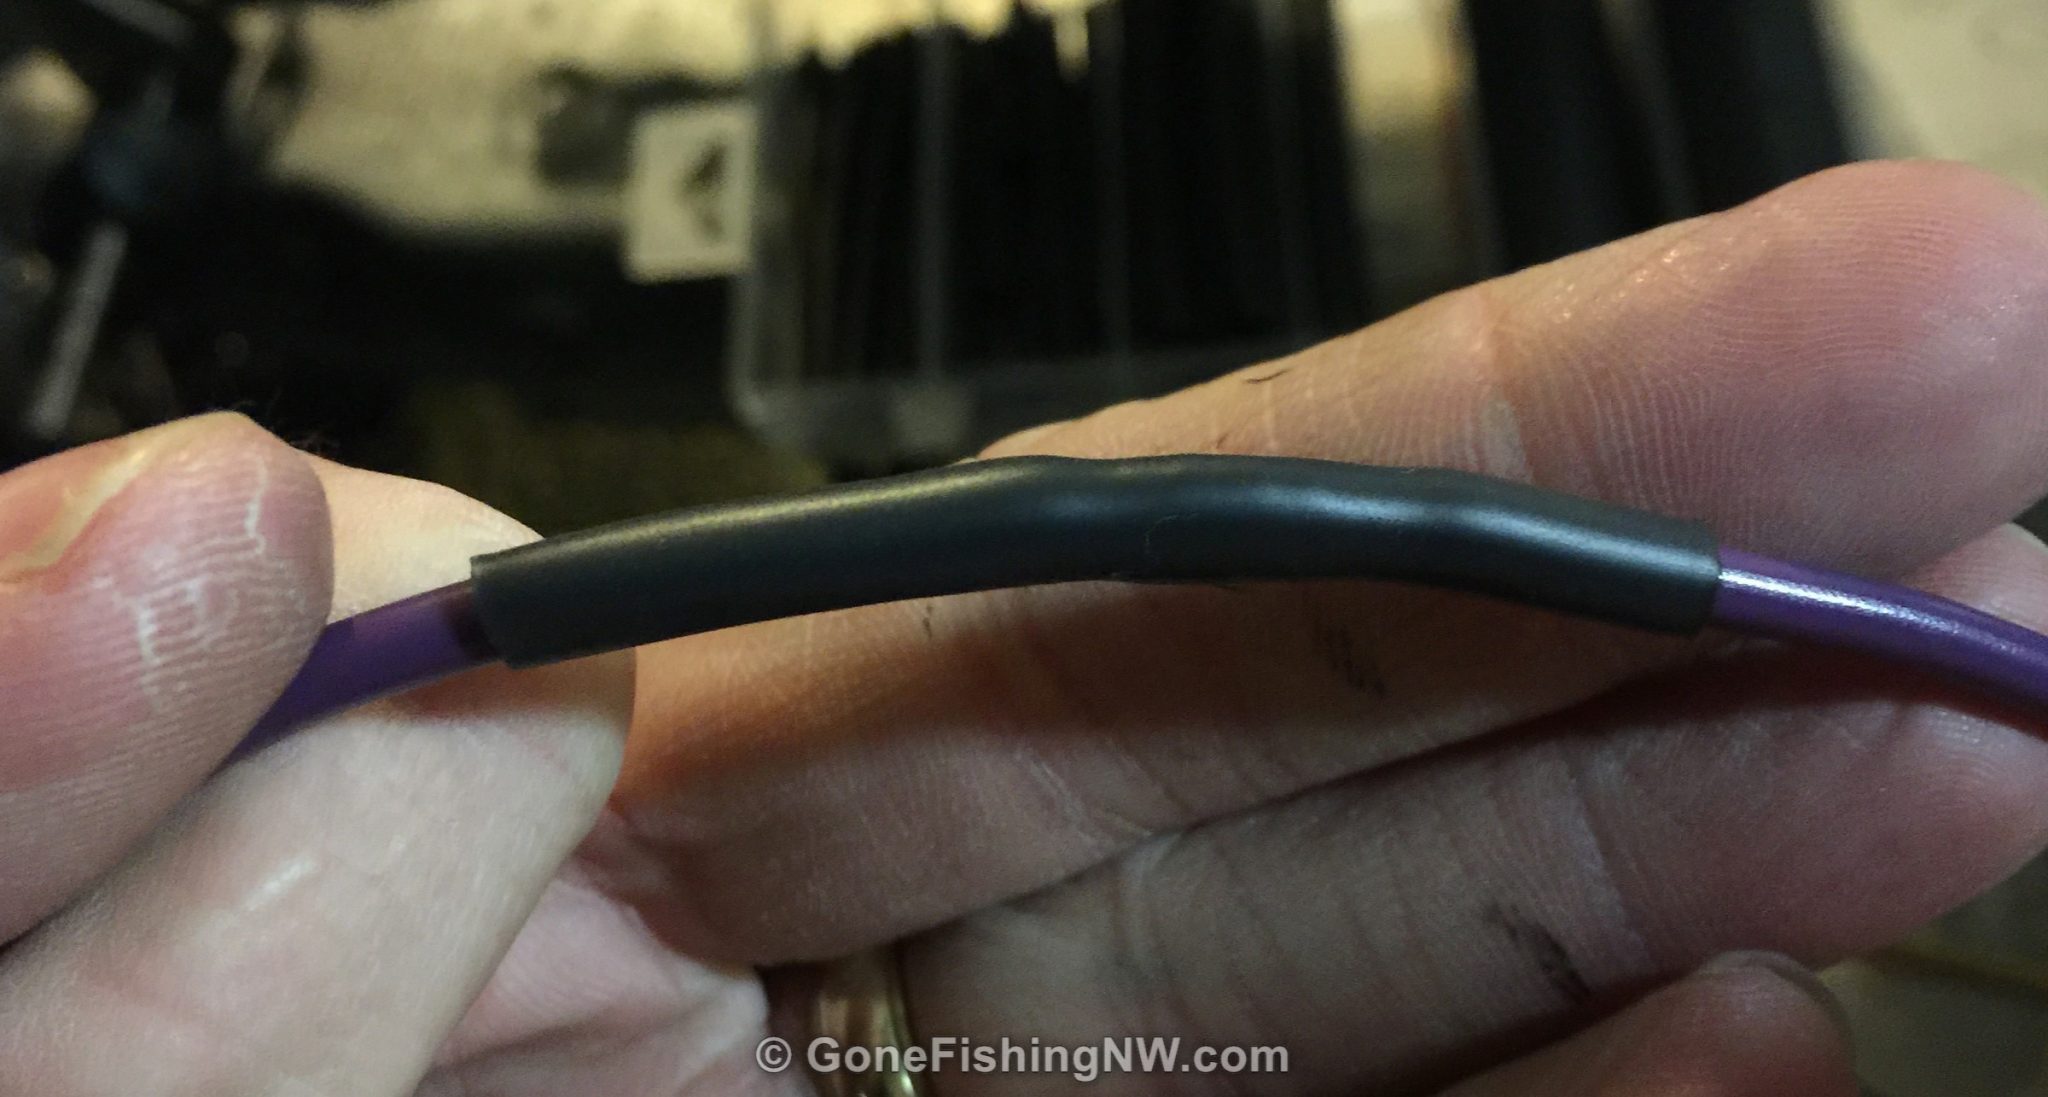
Next I slide on some heat shrink tubing over the join. Apply some heat to shrink it down and secure it in position. This will further reinforce and secure the connection.
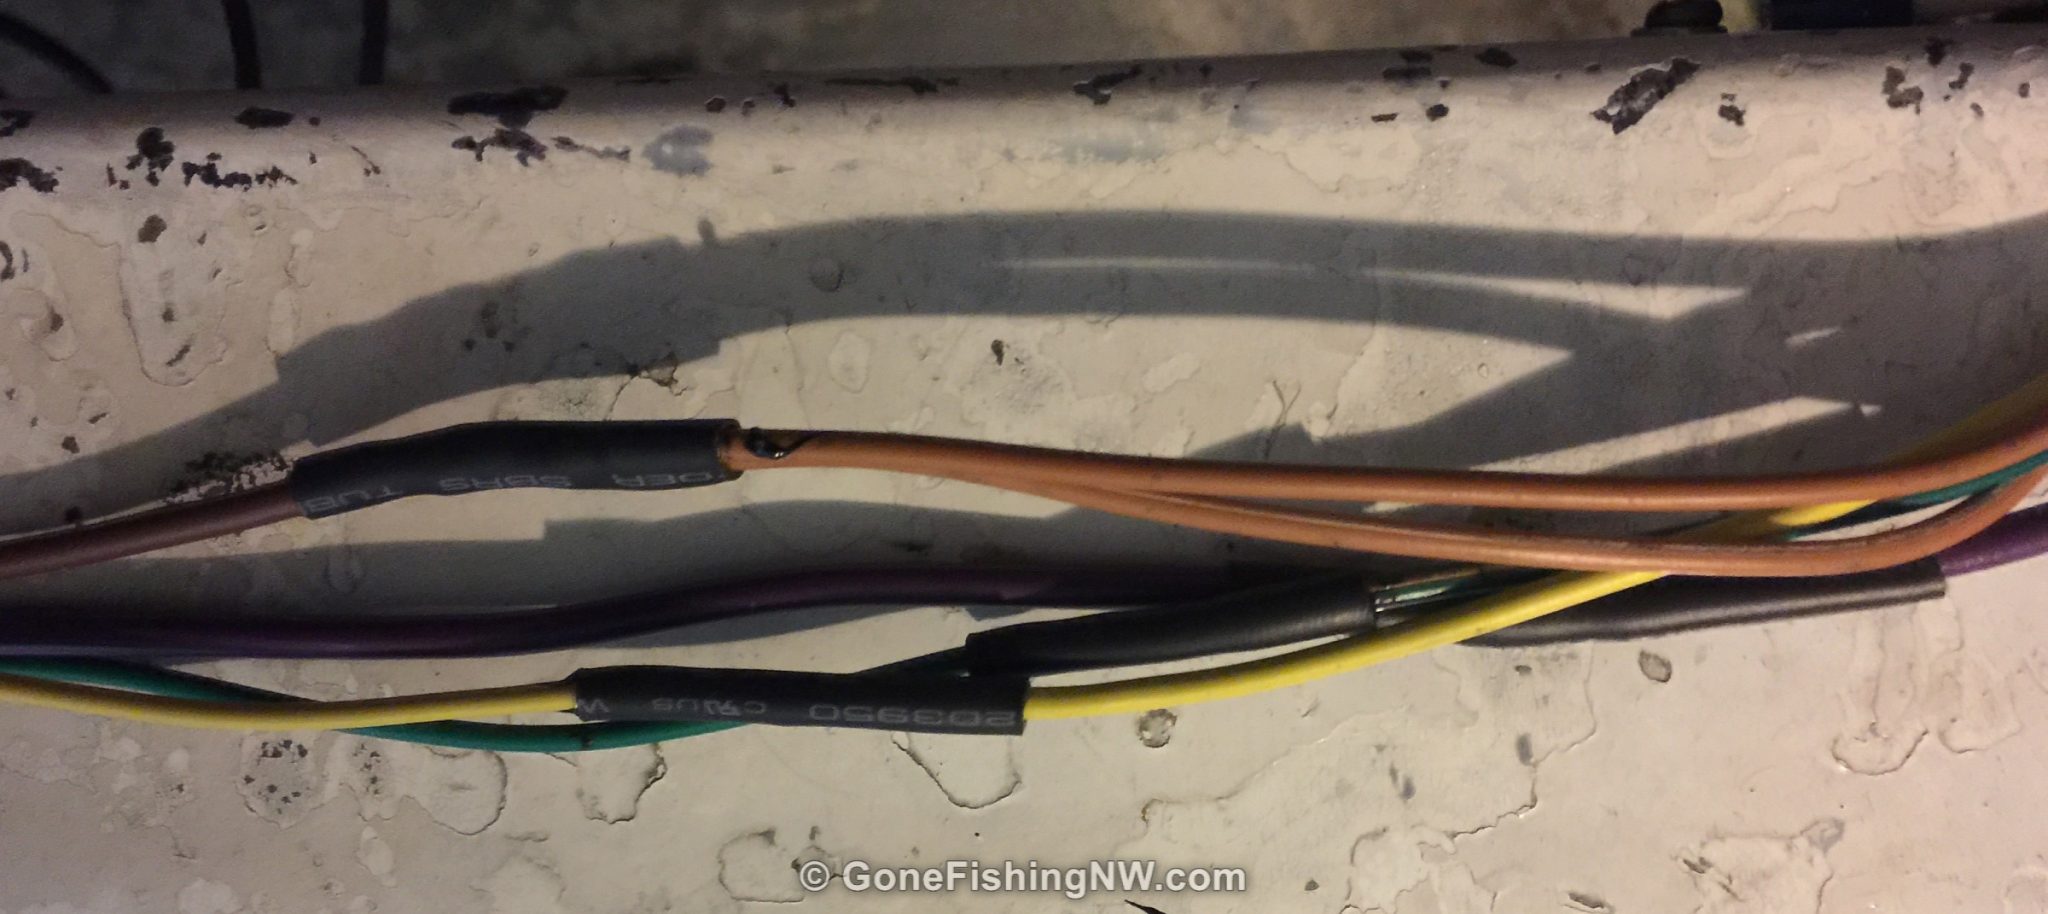
If doing this to a bundle of wires (even just 2), I like to offset the connections to avoid a large bulge. Here is a trailer wiring harness with 5 wires being extended.
Protecting Wires
Your wires may need extra protection to avoid having the isolation rubbed off, or other bad things from happening. Plastic corrugated tubing is a good general choice. It comes in a variety of diameters so you can get the size you need. Most have a slit on the side which allows you to push the wire in. I like to use some electrical tape about every foot to secure the tubing closed.

Connecting To Screws
At the ends of wires you sometimes will secure them to screws, such as those on battery terminals, some lights, switch panels or the frame of the trailer (which serves as ground).
I used to loosen the screw, wrap the wire around it and then tighten it down. Well this is both a pain in the butt, since wires will sometimes slip out, and isn’t very secure.
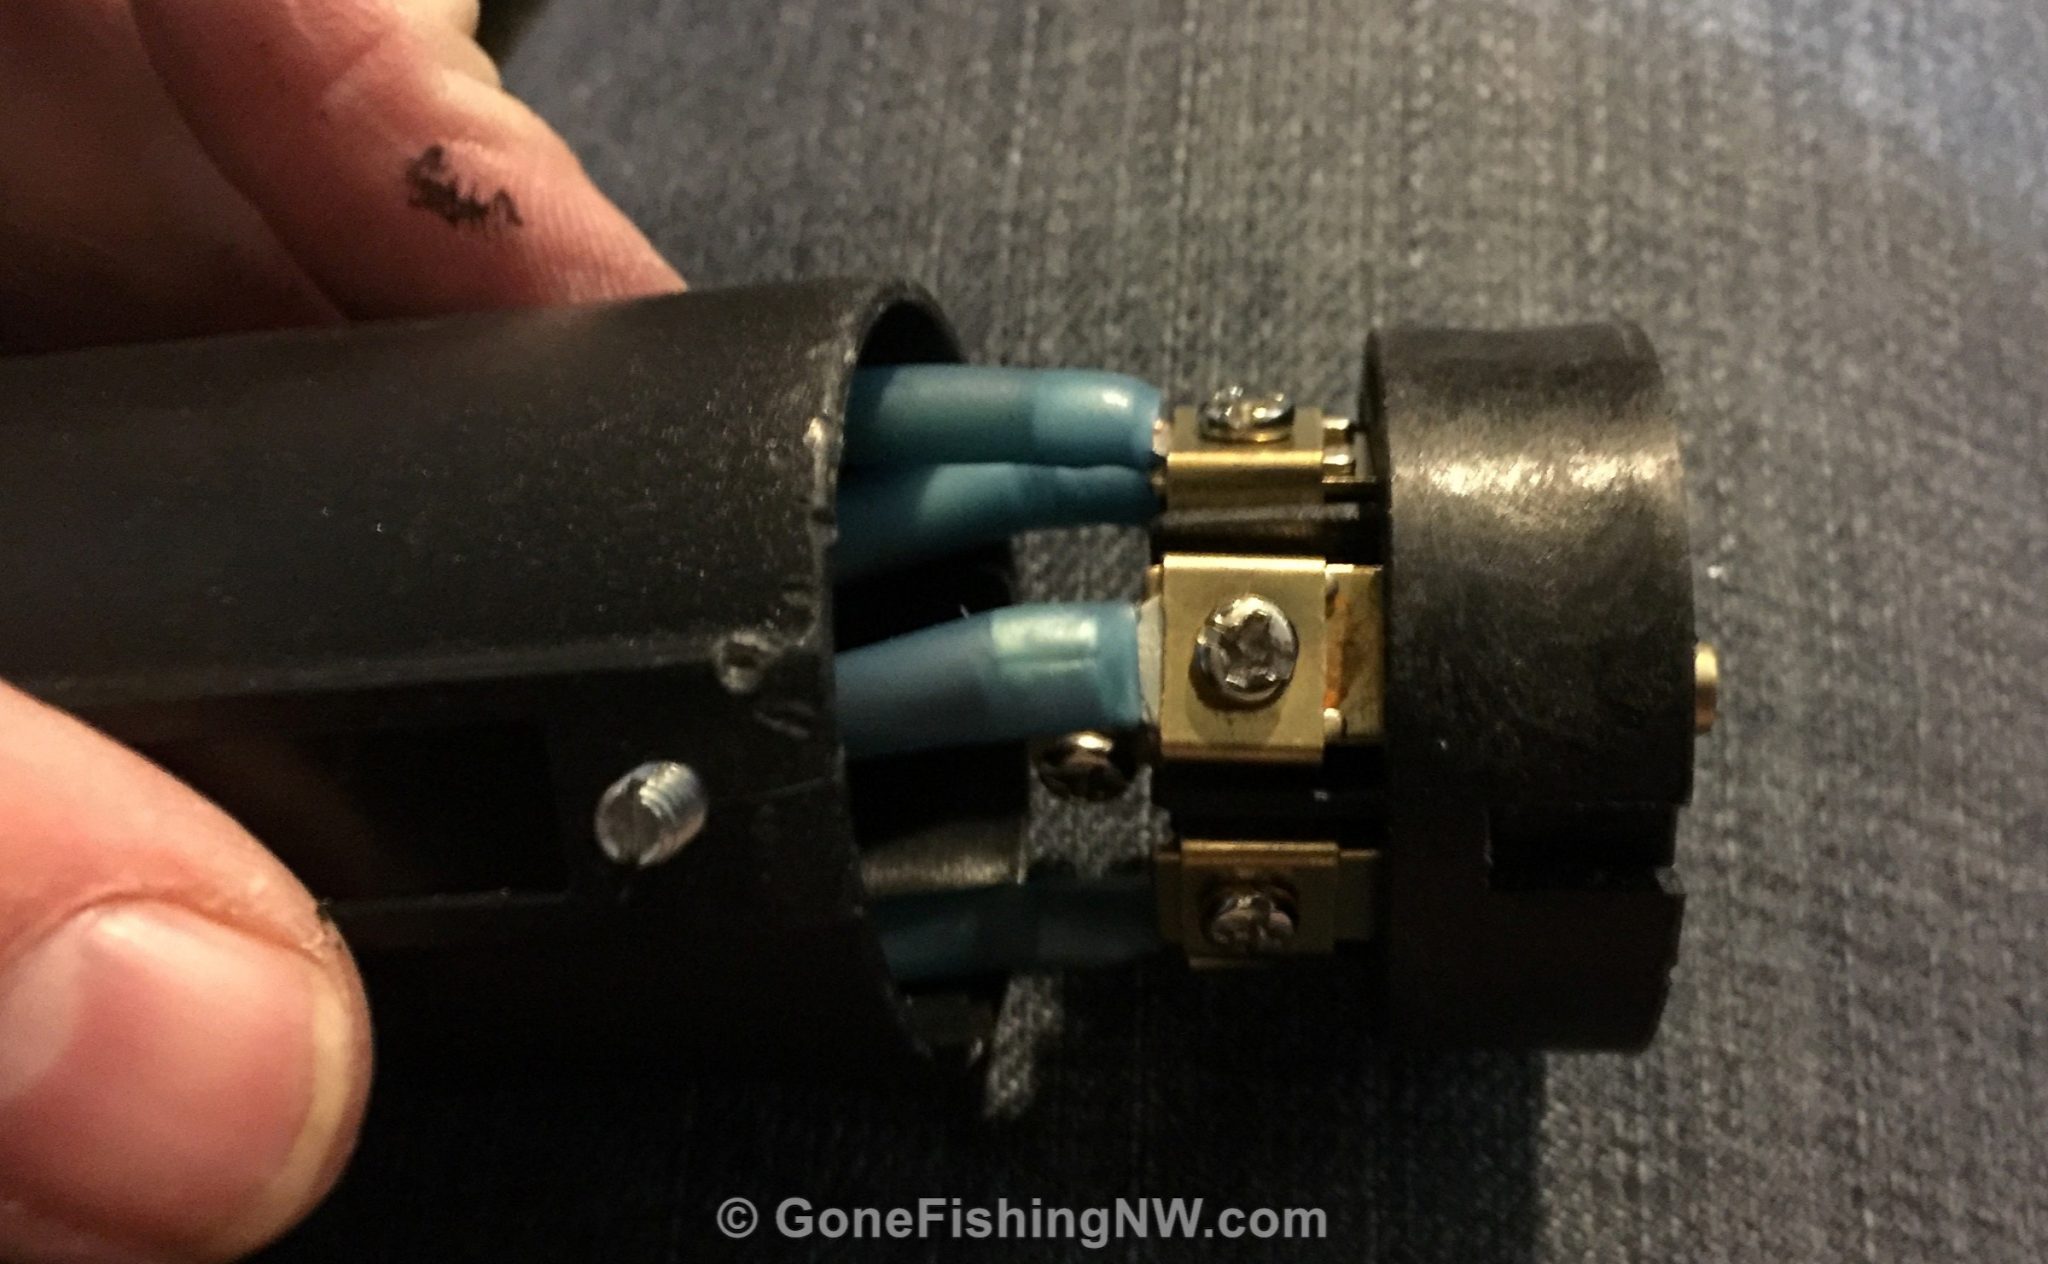
A better way is to use either a spade connector or ring connector. A ring connector has a ring on the end. A spade connector looks like a 2-prong fork on the end. In either case, you connect the wire just like you do a butt connector – strip the wire, insert it, crimp it down and if the tubing is heat shrink, then shrink it.
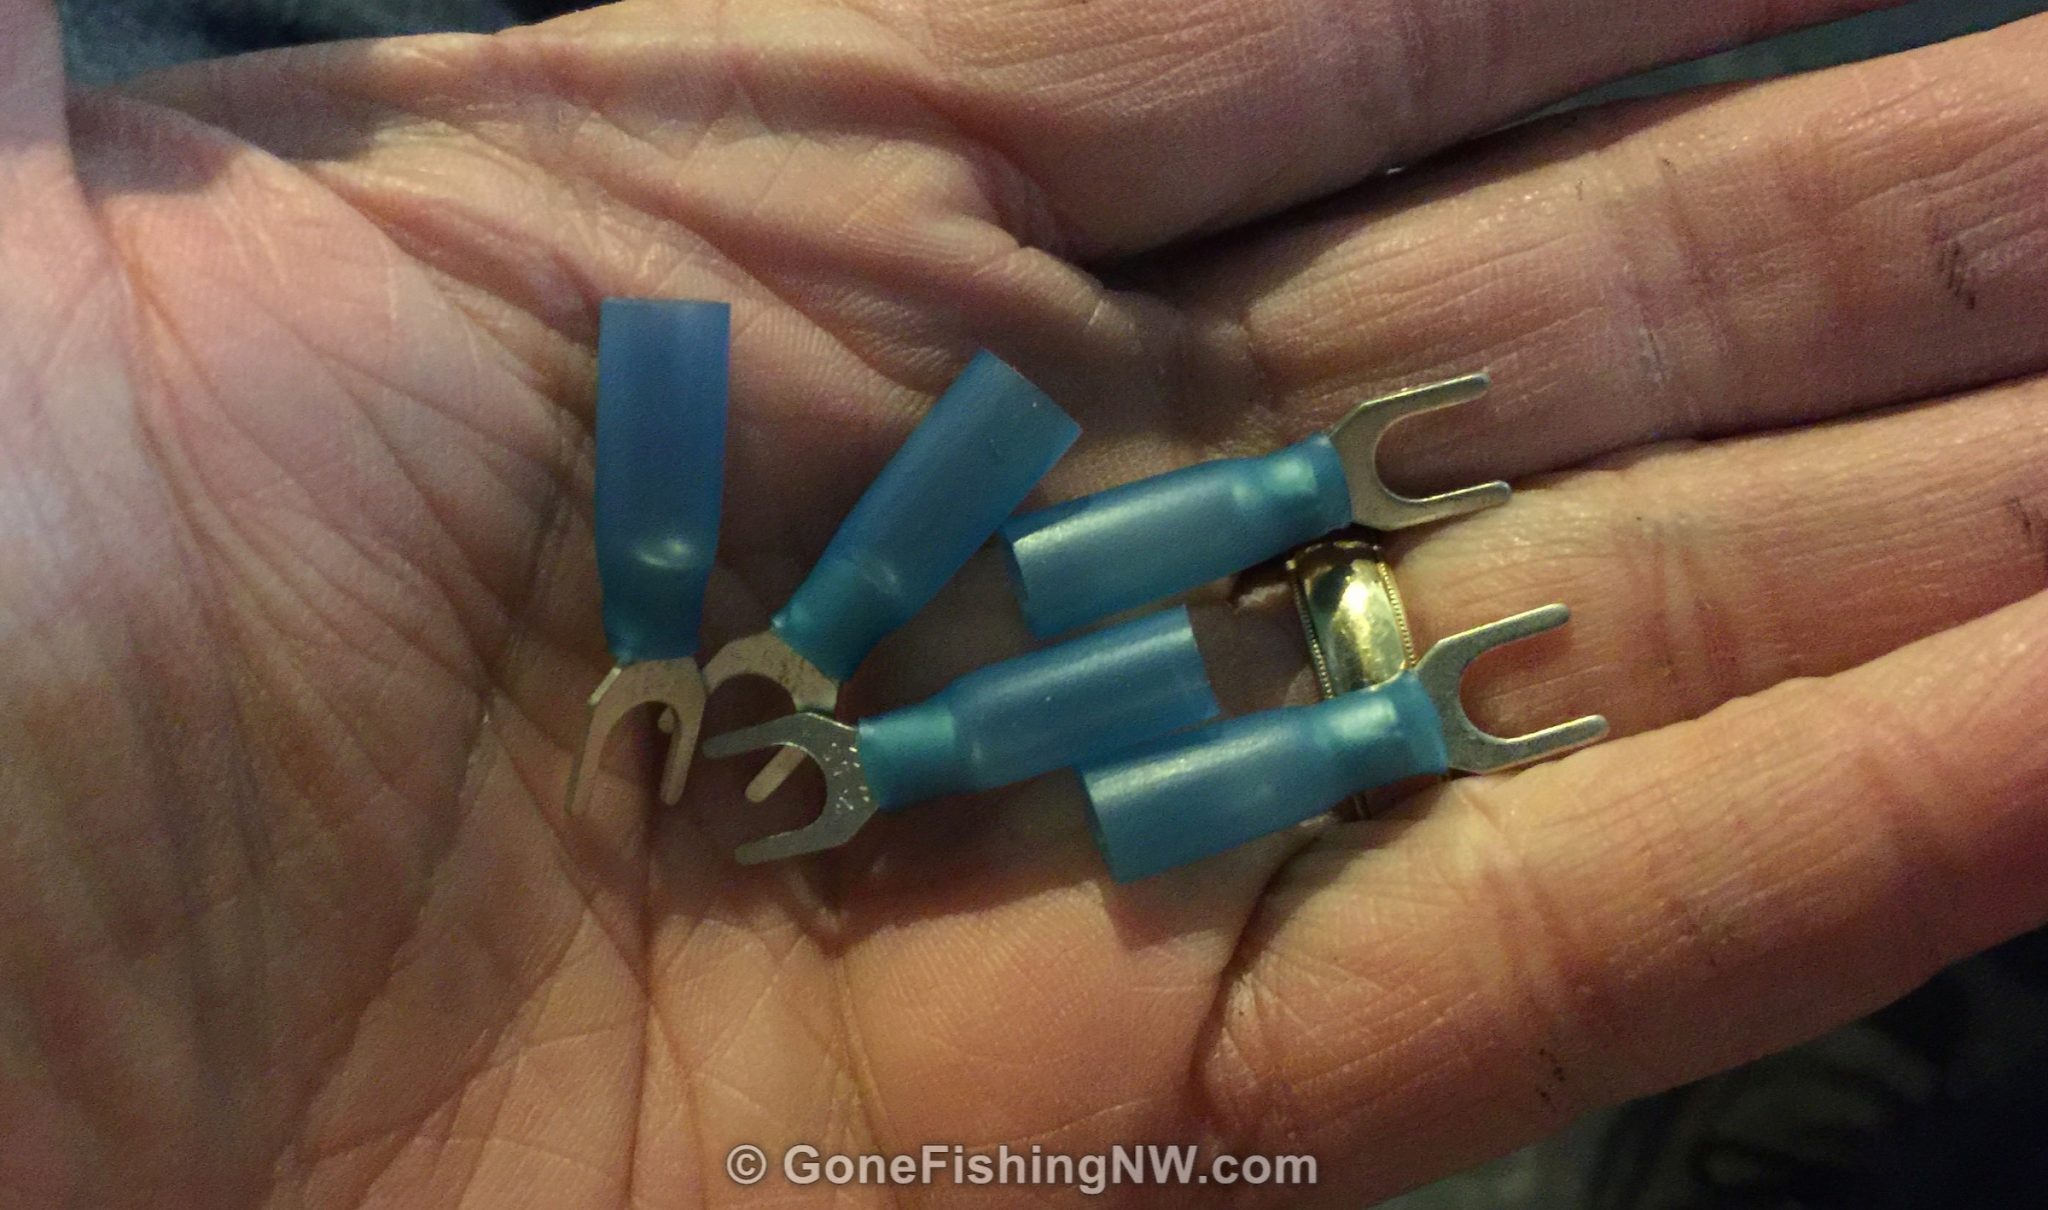
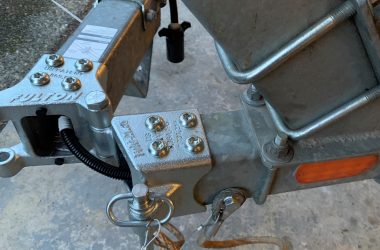
Here is a 7 blade trailer connector where the connecting wires have spade connectors on them. The connectors make wiring it up super easy.
Finished Project
Regardless if you are replacing a light on your trailer or wiring up a new downrigger on your boat, taking your time and doing the wiring right will pay off. Follow the suggestions above and you’ll rarely have to deal with stuff not working right.
Recently the clearance lights on my trailer stopped working. After 10 years they had reached the end of their lifetime. I bought new lights, which I then mounted and wired in using the soldering method above. I fully expect the wiring to last for another 10 years.
![]()
Comments
Was this helpful? What boat or trailer wiring problems have you faced? What do you do to ensure a quality job?
Well written article. It’s sad that so many folks have wiring trouble when it , as you have shown is relatively simple to do the job right. Nice looking work.
I like the idea of the extra copper wrap before soldering. I usually use a lineman splice, but on stranded wire, I end up needing to strip a lot of insulation back, and it’s easy to make it bulky. The wrap method you show seems like an easy way to get a good connection without bulk.